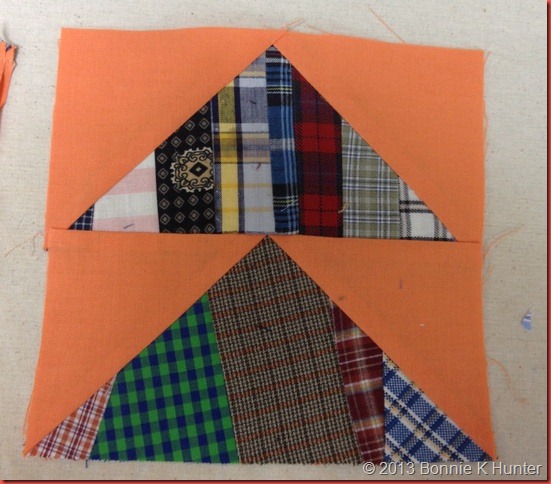
Sewed geese into pairs…
Went to the ironing board and….
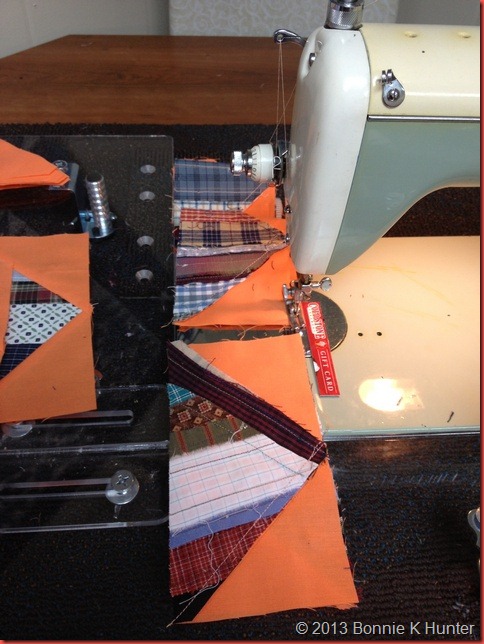
Oh. My. Goodness. These Geese are REALLY BULKY!
String quilts are like this…a lot of seams coming together and crossing when you join them to each other, making it hard to figure out which is the best way to press.
When joining goose-to-goose I like to have the one on the top with its crossed seams showing so I can tell where my seam needs to be in an extreme effort not to make my goose beak-less! Yes, I am a relaxed piecer by nature, but I DO try! Sometimes they get a blunt beak anyway ---but I try!
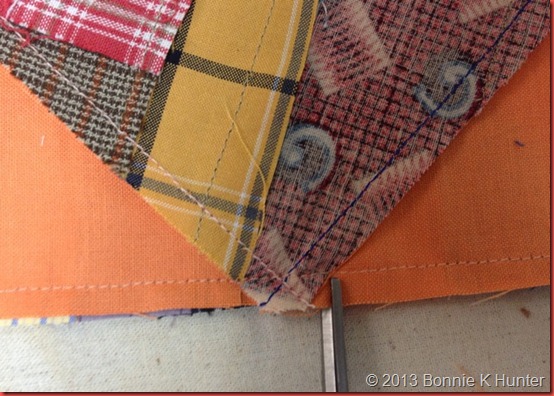
When I went to press….I tried my normal way of pressing the seam up toward the goose above ---but there is too much thickness both on the sides and here in the center to want to cooperate. I tend to err on the path of “least resistance” when it comes to deciding which way to press. But what do you do when the center wants to go one way ((Up)) and the corners want to go the other way ((down))??
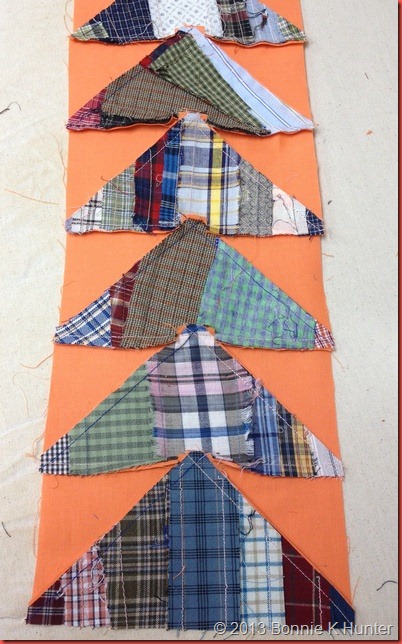
CLIP!
Yes, there are two colors of bobbin thread -- I was using stuff up!
Yes, there are two colors of bobbin thread -- I was using stuff up!
Press THIS way!
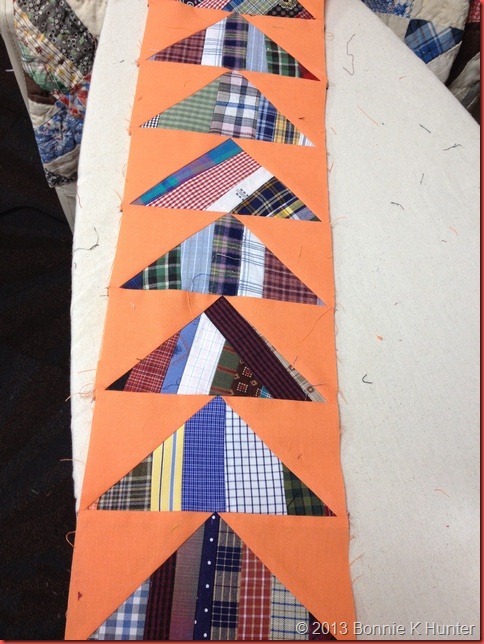
Now the bulky point can point up toward the goose above, and the corners of the string goose above can press down toward the unpieced area --- which is the way it wants to lie. If I had pressed all those seams UP it would have been majorly bulky because I would be doubling seams back against themselves.
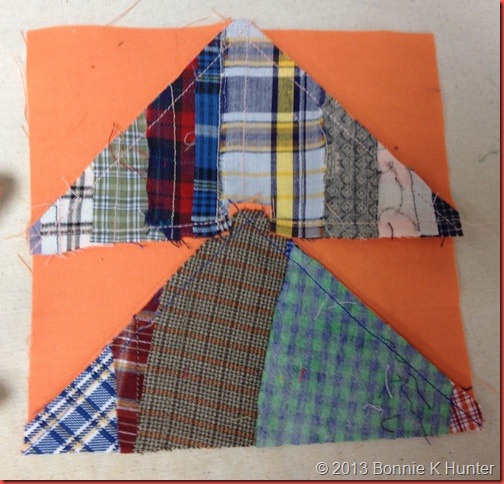
Unit from the front. Pretty good!
Length of snipped geese from the back ---
Length of geese from the front.
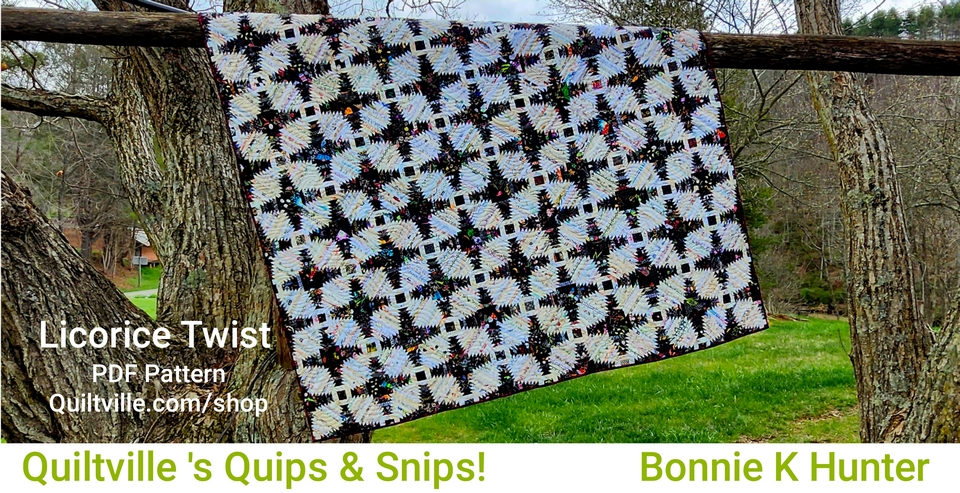
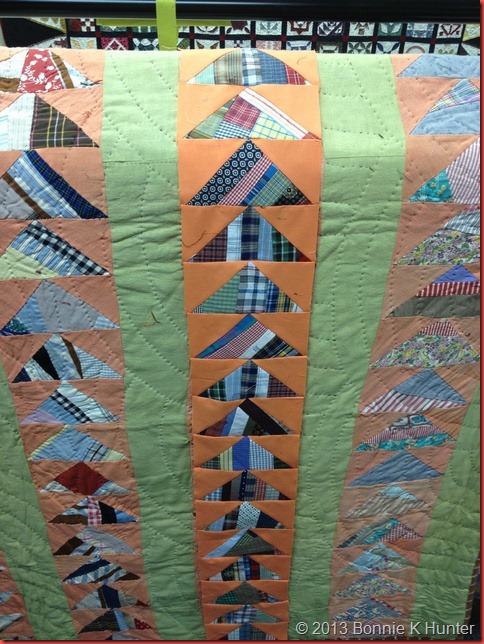
My first row of geese hanging on top of the inspiration quilt!
I'm generally leary of clipping any seam lest it weaken the seam or make it more vulnerable to popping --but in this case, I really think this was the best scenario.
Most of you know this already – but I’ll mention it again. I don’t use steam. I don’t need steam. I just need a good crease on that seam line, and the tip of my iron is just on the seam line only..I’m not ironing the whole unit – it’s not wrinkled. It doesn’t need it, and it certainly doesn’t need to change shape by too much ironing. I use just the tip of my iron on the seam only to get it nice and flat.
That’s all for now! Press On!

Thanks, Bonnie, for this tip. I always feel guilty when I need to clip, but I do it anyway. Now that I know that you have to do it, too, I can remove that guilty weight and sew on!
ReplyDeletejust passing my thoughts: how good would these geese look alternate with strips of blocks from the jubilee challenge..... small border - dark red - separation... hope this will grow somehow in my mind to come into existence. first finish the draught curtain aka fabric door. some 50 more scales to go (from 500 in all), will post when it's finised =^}
ReplyDeletelove from a dark and freezing Amsterdam
Irene
love your "getting it to cooperate" attitude. This is going to be a really neat scrappy quilt.
ReplyDeleteI find many time where I need to clip - not just for bulk, but because it might make the seam go the 'right' direction to make crossing at the tip so much easier, and also in areas where there are so many seams no matter which way you press, an adjoining block just won't match to nest right - clip - and now they nest! :)
ReplyDeleteOh, and I noticed the scissors you use, like I use too, aren't the ones with really sharp pointy ends. Blunter ends help in keeping from accidentally snipping the seam thread.
ReplyDeleteBonnie what do you think of the theory that too much ironing burns and weakens the thread in the seams? I once was told that during a class. Your geese are looking good!
ReplyDeleteHappy Sewing
I have found the same need to clip occasionally. I dab a little Fray Check on my clips. They probably won't fray, but I feel better about it.
ReplyDeleteI have to clip at times and it's good to know that you do too! I love these geese, and I'm kinda burning out on the simple string quilts I've been making for charity - time to try this!!
ReplyDeleteOh, and your comment, "Yes, there are two colors of bobbin thread -- I was using stuff up!" That's one of the (many!) things I truly love about you - you keep it real! My dad just gifted me with half a huge box of many colors of thread from his friend's wife (a quilter who passed away) and I intend to use every one of them. (The other half of the box, he kept for himself! He's 82 and quilting like crazy!!)
Thanks for the tip. I will remember that next time I run into this situation. :)
ReplyDeleteThanks for the tip. I will remember that next time I run into this situation. :)
ReplyDeleteI appreciate all of those good pressing tips. I quit using water in my irons over a year ago. It's nice to know I am not the only one.
ReplyDeleteI am enjoying seeing this quilt come together. I always think it is such a nice feeling when you get to see some of your units coming together for the first time.
You are coming to a neighboring guild next month (Chattahoochee Evening Stars). I am going to try to see if I can see your talk as a guest.
Thanks for all you do.
Bonnie:
ReplyDeleteAnother great tip....thanks for sharing what you learn with all of us. Hope you enjoyed your birthday.
His hi Bonnie
ReplyDeletePressing, I have a question about the construction of the geese triangles. When you were piecing the strings together did you press the seams open or to one side. I can't really tell in the photos.
The geese were papered pieced. By using a phone book and a mess load of strings, she did string piecing, and then cut the geese out of the strings..
DeleteSo I guess the answer would be.. They were pressed to the side..
Thank you for so many little tips that really help us newbies relax and go with it. It is wonderful having permission to do what I have wanted to do all along.
ReplyDeleteI just love that quilt. Did you notice that the two outer rows of geese are paler than the inner rows/columns/gaggles? A neat design element. The quiltmaker had a plan...wasn't totally random....
ReplyDeleteSally, the inner row of geese is Bonnie's, which she has laid over top of the inspiration quilt, that is why it is darker.
DeleteYes, I realize the pictures here have Bonnie's pieced row on top of the quilt, but if you look back at the picture of the quilt (by itself without anything on top of it), you will notice the two outer rows are pieced with lighter pieces than the inner rows. (You can see this if you go to her free patterns tab, click on this quilt pattern, and look at the full photo of the quilt).
DeleteThanks, Bonnie. Now I have permission to clip my seams! :-)
ReplyDeleteyay! really fun. I gotta say I have become a lover of steam. why did I resist it for so long. what do I care if the block goes wonky! fun to see some of the fabric you're using is the same as you sent me years ago when I was living in Paris...
ReplyDeleteGreat tip! My iron has never experienced steam either, but I do give a spritz of Best Press sometimes. Love the way the geese look.
ReplyDeleteOh thank you Bonnie!! This is a great tip and very timely. I ironed my geese on a string. . . I wait to press until the end. Same thought ---ewwww, bulky!! Now I can go back, clip, re-press them and figure out the layout. I think I'm going to go with the spiral layout I showed you with the "chunky" big floral vintage Civil War fabrics from the History Repeated book by Betsy Chutchian of 19th Century Quilt Divas. I have tons of string pages and will probably make your antique quilt inspired version too.
ReplyDeleteGood job of matching the wing fabric! Looks wonderful! By the way, if you get these done, what you going to sew on Quilt Cam?
ReplyDeleteIn connection to clipping seams-we did lots of it in garment construction and clipping off of corners to reduce bulk. I used some of the same principles when putting together my Easy Street. Never raveled out in my clothes, doubt it will ravel out in a quilt!
Have a happy, wonderful and sew-sew birthday! You are so good to us! Thank you so much!
Bonnie thank for this super hint. How many times I have run into this same situation!!!!
ReplyDeleteSmiles, JulieinTN
What a great tip, Bonnie. I am a "non-clipper" but sometimes I can see that it's got to be done and it looks so much better. When I pressed my "double goose" units for Easy Street, it was easier because the goose was not made of strings, but you still get that "goose bump" on every unit where you press toward the goose above.
ReplyDeleteBonnie Hunter......promise us you will never change! I love your brutal honesty, and the way you think! Plus, I love the fact that you "use things up!" BTW, in your opinion, how old should thread be before it's too old to use up?
ReplyDeleteI love this! I really like using up scraps and yesterday, I cut 2.5 and 1.5 inch strips and have some smaller strips in a bag. WHat a useful design to use them for! Thanks.
ReplyDelete