
Chunky Churndash!
(Click HERE for printer-friendly version)
What could be more fun than simple little 6" blocks repeated in favorite scrap fabrics?
We are all familiar with the traditional 'churn dash' block that has half square triangles in the corners. It has long been a quilter's favorite. What if we were to leave those triangles out and piece the corners as squares instead? The result is TOO CUTE!
I have a system of cutting down leftover fabrics into strips in widths of 1.5", 2", 2.5", 3", and 3.5". Anything smaller than a 'strip' gets cut into squares of the same various sizes. This gives me a way to keep things always at hand, always ready to sew together when inspiration hits me!
This darling quilt was made using strips from the 1.5" bin and the 2.5" bin. The centers for the blocks came from the bin of light scrap 2.5" squares, though you could just as easily cut them from your strips if you wanted.

For each chunky churndash block you will need:
1.5" X 11" strip of background
1.5" X 11" strip of 'rail' fabric
(4) 2.5" squares for block corners
(1) 2.5" center background square (can be scrappy or can match the other backgorund strip.)
1.5" X 11" strip of 'rail' fabric
(4) 2.5" squares for block corners
(1) 2.5" center background square (can be scrappy or can match the other backgorund strip.)
Assembly:

Start by sewing the 11" strips with right sides together along one long side. I like using a screw-on seam guide on my machine bed pushed up against the 1/4" presser foot on my bernina. It really helps me keep a good consistant seam!
Press the strips open with the seam allowance going towards the darker fabric.
Press the strips open with the seam allowance going towards the darker fabric.

Fold the pieced strip in half and square off one edge. Using your rotory cutter and ruler, cut the strip into (4) 2.5" sub sections.


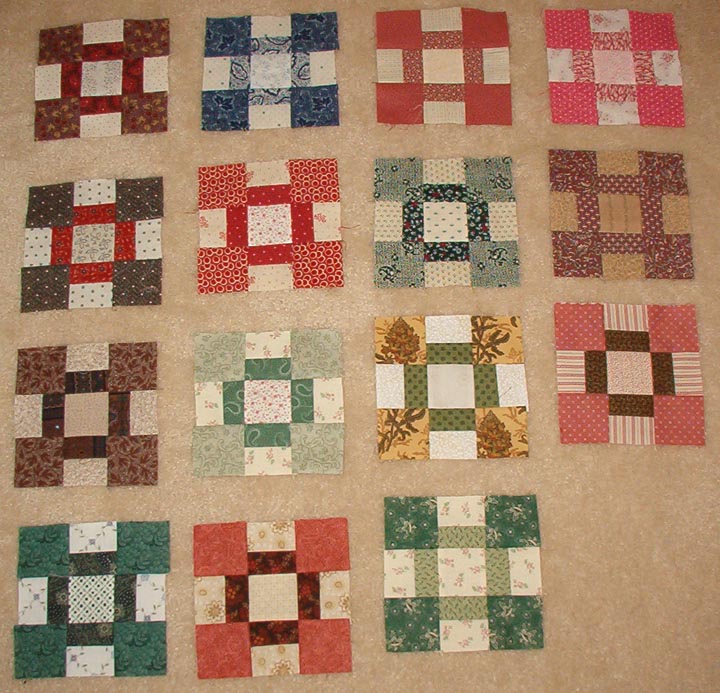
Lay out your block pieces as shown and sew the block together as you would a 9 patch....sew the block pieces into three rows, and then sew the three rows together. Don't you agree these blocks are just TOO CUTE?!? :cD
This pic shows several of the blocks I assembled..the pile is growing!
This quilt has 61 chunky churn dash blocks, and 60 hour glass alternate blocks.
Hour glass alternate blocks are GREAT because they make the blocks look like they are set 'on point', when they aren't! Try this block with other blocks you make too. :c)
To make the alternate blocks you will need:
(30) 7 1/4" squares light background
(30) 7 1/4" squares dark focal fabric.
Cut these squares corner to corner twice with an X. You will get 4 triangles from each square. Pieces are cut this way so that when the triangles are sewn into the hour glass blocks, the straight grain of the fabric is on the outside edge of the block all the way around.
**UPDATE** This is an old tutorial, and if you want to work easier and smarter, these units can be made from 3 1/2'' strips using my new Essential Triangle Tool!


This was the most boring part of the quilt for me! I like working with scraps, working with just TWO fabrics for the alternate blocks really tested my patience.. :cD I chain sewed these as above...sewing a light triangle to a dark triangle, feeding all the triangles through this way. When you have them all chained together, take them to your ironing board and press them all towards the dark. I press first, and then clip between the triangles. Be sure to also slip off the little 'dog ears' that hang out of the seam allowance. These can get in the way when you are piecing the blocks together and make it harder to match points, etc.
To sew the block halves together, flip half of them the other way, so that darks are touching lights and lights are touching darks, making the hour glass block as above. Chain sew all the 1/2 blocks together. As soon as you get this boring part done, then you can play with the layout of your fun scrappy blocks!

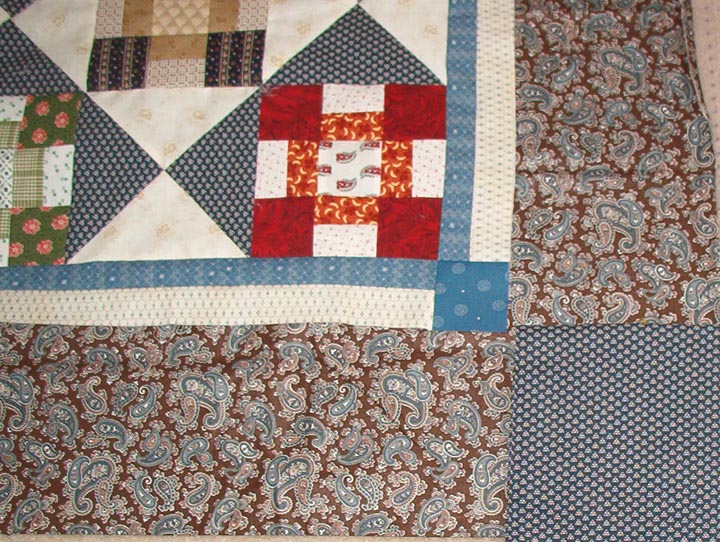
This is how the hour glas blocks fit next to the chunky churndash blocks! Can you see how it is coming together now? (Even if the hour glass blocks were the boring part!!)

Oooh look! it isn't so boring now!!

The whole center on my living room floor :cD
This pic shows a closeup of borders, after trying several different ones!

It's not a quilt until it's quilted! I machine quilted this quilt using an edge to edge design by Willow Leaf Studios called "Rhapsody".

I really want to try this one! It's lovely!
ReplyDeleteBonnie, you are so generous with your quilt patterns!! I have made a couple of your patterns and can't believe how easy they are to follow. Thank and keep up the good work. Barbara
ReplyDelete