
Weed Whacker!!

Finished size: 68"X85"
Click HERE for Printer-Friendly PDF
More fun with 2" strips! I just love the motion in this quilt! These versatile, easy blocks can be set "Spinning" or in straight rows for a fun strippy quilt!

To make each 9" finished block you will need:
(6) 2"X9.5" strips in medium and dark tones.
(6) 3.5" light squares
Because I like to keep the piecing as continuous as possible, I like to gather the pieces for 4 blocks and sew 4 blocks at a time.
If you don't want to cut out the whole quilt at once, this is a good way to work because you can cut strips for 4 blocks at a time and it gives some variety to the cutting/piecing process!
If you want to sew this way, for 4 blocks you will need:
(24) 2" X 9.5" strips in medium and dark tones.
(24) 3.5" light squares.
***IMPORTANT!!!*** This quilt block requires VERY ACCURATE PIECING.
You have 6 strips sewn across a 9" block, and if your seams are more than 1/4" your block will turn out too narrow.
Before sewing your blocks, please do this little test:
Sew (3) 2" X 5" rectangles side, by side by side. Press. Measure this unit. It should be EXACTLY 5"X5". If it is short in width, you need to adjust your seam allowance a bit narrower. If it measures wider than 5", you need a bit more seam allowance. Practice again, remeasure. Is your unit measuring 5" wide? Find what YOU have to do to get that right seam allowance so that the pieces will fit together right.
On to the blocks! Match the strips in pairs, and sew down one long side of each pair with right sides together. Press the seams to one side.


I stack the strip pairs next to my machine with the pile of 3.5" light squares.

Take a square, draw a diagonal line across it from corner to corner, and lay it on top of a strip pair. Sew on the line through all layers. When you reach the corner, don't cut the thread. You are going to continue onto the next strip pair/square and sew them all together in one long chain.


And an option for you:
If you want to save your bonus triangles, and have them already sewn together before we cut look at the pic above. I've moved my needle position over a bit to the right, and sewing a second seam line 3/8'' away from the first seam.
You can also draw a second line if you want. Yes, this next seam is just a bit under 1/2"but I don't go wider is because I am aiming to get the bonus triangle squares to measure close to 3" and finish at 2 1/2''.

Press the seams towards the LIGHT triangles.

Repeat and add the triangles to the opposite end.


Here is a pinwheel I made with the cute little leftover bonus squares! I squared the units up to 3" square, so this pinwheel block will finish at 5".


She writes: "Bonnie, Here is my version of the weedwhacker quilt! I made a lap size. The only thing not scraps were the borders and sashing. But I used up ALL the pieces! What fun!!"


After you've sewn on the second set of triangles to the strip pairs...double sew them as above if you so desire, and trim the bonus triangle squares off. Press towards the light triangles. To make each block, stitch three of the pieced units together side by side by side!
Lay out 4 blocks in pinwheel fashion to create ONE BIG 18" Weed Whacker Block!
12 big 18" Weed Whacker Blocks laid 3 X4 make this quilt center!
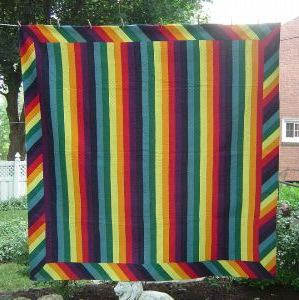
And for fun: If you lay out all the blocks straight, you get a strippy effect! This would look great with sashings stitched between the rows, Chinese coins fashion!
Jackey in MA made this fun version!
She writes: "Bonnie, Here is my version of the weedwhacker quilt! I made a lap size. The only thing not scraps were the borders and sashing. But I used up ALL the pieces! What fun!!"
Way to go, Jackey!
Joseph's Coat Borders:

I have always loved Amish quilts and the bold graphic impact they have! I saw this border on an antique Amish Joseph's Coat quilt and knew that was what I wanted to try for the Weed Whacker Quilt.
I had sewn on a 2" cut inner border in black on black check, but when it came to the outer border, no single fabric I had seemed to do the trick for me. The time had come to try my hand at a Joseph's Coat border.
There is no yardage given for this part of the quilt, it is going to depend on your strip length as to how many sections you can get out of your strip sets.
Make a bunch of strip sets from (4) 2" strips. I sew the strips in pairs, and then sew two pair together. Press seams to one side.
Look at the first pic above because there is going to be "SOME" waste, offset the two pairs of strips by about 1" to 2" so they stair-step.
I wanted to avoid a "true" bias on the edge of my quilt, so I decided to cut my angles with a 60 degree ruler. Align the ruler at the base of your strip set, and make a clean cut on the left side. Then take your regular ruler and lay it along that cut.
I cut 6.5" subcuts from all my strip sets. The longer your strips, the more subcuts from each set you are going to be able to get. To be sure I had enough, I laid these out on the floor around my quilt center to make sure I was going to have a long enough length to go around all 4 sides. You might even go a couple strip sets extra as you don't want to run short here!
Join the sections, mixing them up with as much variety as possible to distribute your scraps around the quilt. Looking at the photo above, you will see how you need to off set the seam allowance just a bit to keep the edges of your borders even.
I joined the units into pairs, then into fours, then into eights until I had enough in one long length to cut all four borders for the quilt.
Press seams carefully where you joined sections. Square off one end.
Measure through the center of the quilt from top to bottom and cut 2 border lengths this size. Attach borders to both long sides of the quilt, matching centers and ends and pinning, easing where necessary to fit. Press towards inner border.
Measure across the quilt center from side to side, including the two side borders you just added. Cut two borders this size, one top, and one bottom.
Attach the top and bottom borders to the quilt, pinning centers and ends and easing where necessary to fit. Press seam allowance towards inner border.
Set machine to a bit larger stitch length, and stitch around the outside edge of the quilt to prevent all of the seams from popping open during the quilting/binding process.
I love pieced backs! You can ALWAYS make a big dent in the scrap stash by piecing your backs from many fabrics.
I like to cut 10.5" squares of lots of fabrics, usually from the same color family, all blues, all reds, all neutrals, all pinks, etc.
Why 10.5" squares? I can get 4 squares across a 44" wide piece of yardage, and have really NOTHING but selvages left over. Total fabric annihilation!
The squares finish at 10" so it is easy for me to figure out how many squares I need to go across the width and down the length of my quilt to construct my back.
You can use any size of square you want, but I like to keep the math easy for me. I sew the squares block to block, but if you want to avoid seams that intersect you can offset them for a whole different look. Experiment with it!
If you have fabric coming out of your ears, are you really thrilled with the chore of having to go buy a 6 to 9 yard piece of ONE fabric for the back of a quilt?
And here is the quilting in progress! Since the border was Amish inspired, I quilted a curling Amish feather there in fuscia thread! A whirligig feather is in the weed whacker pinwheel sections, also in fuscia, and the light areas are filled in with peacock feathering using a signature pastel variegated thread.
This one was made by Nann! She used greens as her common background color, and her bonus triangles were used in the wonderful pieced border. Way to go Nann!

Oh, just looking through all these projects, I could spend weeks at my machine and ignore my house and family :) Thankfully for them I have a sense of responsibility. I am going to try a crumb quilt soon and I love the weed wacker quilt. Oh, also love the bargello, that's on my list to try too. Love, love it! Thanks for the inspiration!
ReplyDeleteyour work is incredible. Thank you for the wonderful instructions.
ReplyDeleteyour work is incredible. Thank you for the wonderful instructions.
ReplyDeleteWhat a great quilt! Wouldn't it fe fun done with Men's ties??
ReplyDeleteWhat a great quilt!! Wouldn't it be fun done with Men's ties?????
ReplyDeletethank you Bonnie, you are inspiring me to break the mould (mine) and do a scrappy blocks and strips block. It's not hard to do, but is for me. he he he
ReplyDeletehi... i just love love your quilts. I am definitely going to try this one it seems easy. I am from India and am self taught to a large extent.where can i post the picture of this quilt once i make it? my name is sandhya and my mail id is runisavi@gmail.com
ReplyDeleteNice blog.
ReplyDeleteorganic cannabis products