
Scrap User's System!
(Click here for printer friendly version)


TOO FUNNY!! A friend in California sent this pic!
This is truly a "Sign of the Times" :c)
*Update, Dec 29, 2011*
(Click here for printer friendly version)
TOO FUNNY!! A friend in California sent this pic!
This is truly a "Sign of the Times" :c)
*Update, Dec 29, 2011*
This original post was written long before blogland existed, and I've moved it over here where things are easier to find on the blog.
Like all good things in life ---our methods evolve. And what once worked for me quite well, needed some fine tuning the more I got into my own Scrap User's System. I still follow the belief that if I have my scraps cut into usable sizes, I can find more ways to use them, and I love that I have a variety to choose from. If you want to see how I'm storing my strips now, click HERE and read this post!
I'm sure we've all heard "Oh, it's just scraps." Have you ever stopped to realize that your scraps cost you just as much per yard as the original fabric purchased that they came from? Your scraps could be worth $9.00 or more a yard. Makes you think twice about tossing them out, doesn't it? Or relegating them to the lowly position of "just a scrap"? :c)
It used to be if I wanted to make a 'scrap quilt' I'd have to dig through all my scraps, big chunks, odd shapes, pieces of this or that all stuffed in a basket or box for 'some day'.....I'd have to iron them, sort them, cut them...even before I started sewing. I think I would lose interest before the quilt even got started! Are you the same way?
I thought first about calling this the "Scrap Saver's" system, but the point is...we want to USE our scraps, not hoard them! The purpose of this little explanation is to show you how I continually work my scraps so they are always at the ready for scrap piecing. I've been doing this for years now, and it WORKS for me. I have shared this with many quilters who ask how I get so much done. So this is my effort in explaining how I work with scraps, and make my scraps work for me.
Remember when you were little that wooden blocks came in different pre-cut sizes (or legos if you aren't that old!) and you could make things with them? Build a house, build a road....certain sizes just went together and FIT. I think of my scraps like building blocks...and that is what they do go for, building QUILT blocks!
First off: STORAGE! You need a way to have your scraps at hand in the sizes that you will use them most. I like those stackable sterlite/rubbermaid type plastic drawers that come in all sizes. I like the ones that have the clear drawers, it helps to be able to see what's in them. You can also buy those little plastic 3 drawer rolling carts. I have some of both! I am lucky to have a great place for these, because I use the space that is underneath my longarm machine table.


In these bins are rotary cutting tools and rulers, notions and marking tools. And then there are strips of various sizes, all in their own bins by width, and all my FQ's, sorted by color. I also have some LARGE bins (far right in pic) that hold my collection of 30's prints all together, some UFO's, and one big bin of denim jean pieces, and the last bin is for "strings". I think of "strings" as anything less than 1.5" wide, or something long and tapered from squaring off a cut of fabric. I like string quilts so I toss those into that bin. But only save strings if you are going to USE them. That goes with anything else I say here. Do what works for you, and use it! The rolling cart drawers hold pre-cut squares and bricks, and one drawer for left over odd sized triangles.


Bin of strings, and drawer of the smallest crumbs that I can't bear to toss away. I DO use these so it is okay for me to save them!
I sort my strips in sizes of 1.5", 2", 2.5", 3" and 3.5". I've pretty much STOPPED doing the 3" strips because they don't seem to work with other strips in any combination. (They don't play nicely with others! :cD) The 1.5" and 2" and 2.5" can combine with each other in different combinations and then go with the 3.5", but there are not a lot of combinations that work with the 3" strips! (not a lot adds up to 2.5" finished) So I'm going to have to challenge myself this year to come up with some quilts that just use 3"strips and squares or something to deplete that drawer. It might be just ALL SQUARES, but it will use them.
I consider a strip anything about 12" or longer. Anything shorter than that gets cut into squares and bricks.
I have 1.5", 2", 2.5", 3.5" squares and I have bricks in 2"X3.5" and 2.5" X 4.5". A brick is the height of one square, with the width of 2 squares, plus seam allowance. If you wanted larger bricks, another useful size would be 3.5"X6.5". (finished at 3"X6", twice as wide as tall plus seam allowance, get it?) :c) Bricks are used for flying geese type units as well as by themselves.
Some of my strips are separated by light/dark If there are enough strips to have 2 drawers of that size strip to contain them. My 2" strips are this way. One bin for light 2" strips, and one bin for darks. I haven't separated the others yet, I'd need more drawers!
I do have the 2.5" squares also separated into lights and darks. The 2" squares are all thrown in a bin together as are the 3.5" squares. I just don't have so many of them yet to need more than one bin for them.
Some people are really into collecting "nickel squares". (5"X5" charm squares) I find that I can work up the nickel type patterns easier and faster with more variety by using my pre-cut strips, squares and bricks, than if I had cut my scraps into nickels only to have to cut them down again into smaller units in order to make the nickel quilts. Look at the block mock ups, see what the units are constructed of, use the pattern as an idea, but see what you can do with your strips and squares easier and faster because they are already cut and waiting for you to dig into! A lot of your scraps aren't going to be big enough to cut nickel squares out of in the first place...but you can often make the same blocks by using your 2" or 2.5" strips...
*Note* Just for your information, did you know that you could get three 1.5" strips, three 2" strips and three 2.5" strips all from a 1/2 yard of fabric and it would be out of your nagging stash, into your strip bins and ready to be used? If you really want to slice up larger pieces, this is the way to go. Cut a few slices of different sizes and feed them into their bins! You'll be using those strips in no time.
So, how to start? Do you need all sizes of strips all at once? NO!
What started this whole process for me was the desire to make a scrappy broken star log cabin:

I needed a gazillion 1.5" strips in lights and darks! So...as I worked on taming my scraps, that was the size I concentrated on. Once this top was born, I still had a lot of left over strips! No problem, I knew I could do 4 patches and 9 patches and rail fences and other things with them. Bin #1 was born!
I thought about a quilt I wanted to do that could use 2" strips, so for the next while I started trimming things down to THAT size...I was off and cutting for bin #2!
What I suggest you do is find a pattern...any pattern...something that calls you, something that says MAKE ME! And start taming your scraps with that pattern in mind. And plan to have LEFT OVERS! If you are cutting across a piece of fabric for 2.5" cuts..and there isn't enough left at the end of the fabric to get a full 2.5" width...cut the next size lower...feed it into the 2" or the 1.5" bin or into the strings.
If your scraps overwhelm you, try this....set your timer for 15 minutes and just trim for that long! Then reward yourself and go sew something :c)
When trimming something you really HATE? Don't be afraid to throw it out if the fabric content or quality is questionable.. I have come across poly/cotton blends from when I was first sewing and said good riddance and poof they were gone. No guilt there!
Something you aren't sure you like, but don't want to toss out? My rule? If it's still ugly, you just didn't cut it small enough! Cut it as narrow as possible! 1.5" is good! By the time you take the seams you've only got 1" of fabric showing. And don't forget something I learned from trying watercolor quilts...(which I gave up on, but that is another story! *LOL*)...you can always use the BACKSIDE of a fabric if you don't like the way the front looks...look at the back side before you give up on it!
 You should have SEEN what uglies I used up in my Perkiomen Daydreams quilt!
(this pic is before quilting cuz it's the closest pic I've got)

It doesn't look too bad from
this far, does it? But take a look at ONE BLOCK!
this far, does it? But take a look at ONE BLOCK!

It seems I am always trimming down some leftovers from something and putting them into this bin or that bin. Right now I've got the left over borders from a quilt, a long 5" wide piece of left over border, and a strip of 2" inner border...the inner border went into the 2" bin right away...this 5" border I think I'll just cut in half and put it in the 2.5" bin. Anything 6" or wider I fold and tuck in with the FQ's. I clean up after every quilt this way and keep channeling things into their proper spaces. It always gives me something new to work into my scraps!
I like to think of my scrap strips like sourdough starter. You know, to make a batch of sourdough bread, you take some starter, add it to the recipe.......but before you are finished, you have to add something BACK to the starter to keep it going. Even though I am continually using my scraps, I continue to add back to them with the trimmings from other projects, pieces of binding, borders, sashings, backings, and other pieces from block construction. Cleaning up after a quilt is finished, trimming down those pieces and adding them back into the scraps is part of the process for me!
Now that you are thinking about sorting your scraps and making them useable, you need to think about how to USE them! I am always on the lookout for patterns and ideas that will use what I have already cut, rather than the other way around. Most people see a pattern first, decide to make it, then go to their stash to pull fabrics. Well, my fabrics are ready, I just need to find the pattern that is out there waiting to use it.
Most blocks can be broken down into grid units. A 4-patch is a 2X2 grid. A 9-patch is a 3X3 grid...a pinwheel is a 4X4 grid, etc. You can make any block any size with the grid system. Graph things out on graph paper! You can see how things are broken down into units that will use the strip/square/brick sizes that you already have on hand. You will get good at saying...
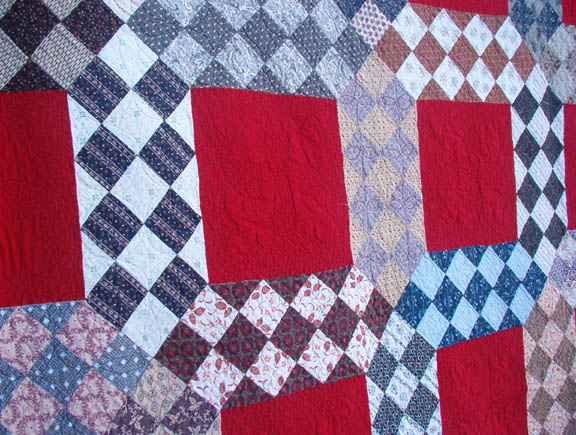
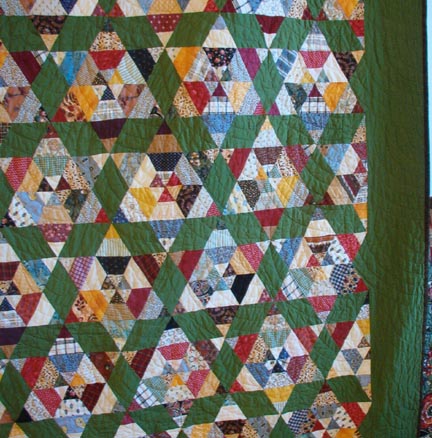
There are many formulas for scrappy quilts. I tend to like the 'kitchen sink' variety where I throw EVERYTHING in and separate lights from darks as the only method of contrast. Sometimes there can be a common element that settles things down, like using one background, and all scrappy darks.....or the use of one color in one section of the block, repeating in ALL the blocks to bring out the pattern. I did this with the scrappy sister's choice. They all have scrappy 9 patches in the centers, different in all blocks. All have scrappy lights for the backgrounds, but the one common element is the use of green for all the star points.

By the way, the sister's choice block is a 5X5 grid pattern! All pieces came from 2.5" scrap strips!
Can you see how the green star points, even though each block has a DIFFERENT green, adds some continuity to the quilt top?
Can you see how the green star points, even though each block has a DIFFERENT green, adds some continuity to the quilt top?
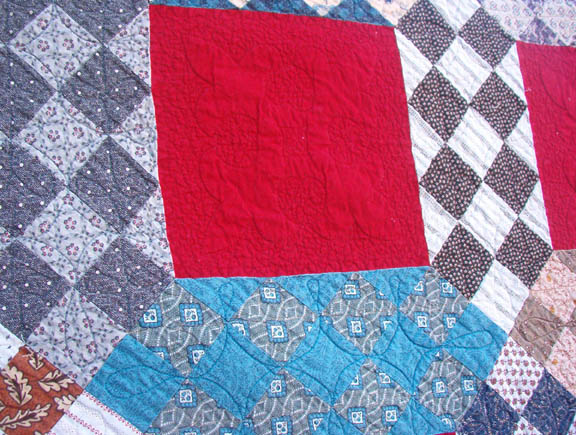
Some scrap quilts are very effective in controlled color pallets. I have done several. One of my favorite color combinations is blues and lights. My blues might range from very light all the way to navy and everything in between. The lights might go from white to cream to beige to tan, but they are still considered 'light' against the blues.

This would look totally different, and completely wonderful in 'kitchen sink' variety as well.
This block is a 4X4 grid.

If you were to super-impose lines over the block, you could count 4 grid squares across, and 4 squares down.
This block used 2" strips, or 2" squares...and 3.5" strips.
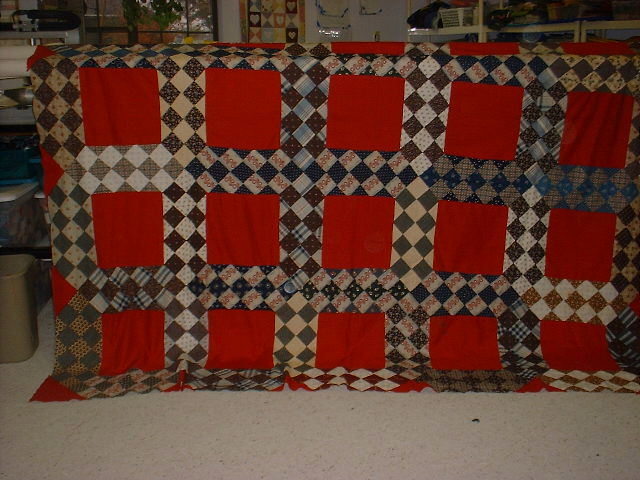
How about three colors? This quilt (quilting in progress) uses one common white background with various scrappy blues and reds as the main design element:

The solid white background gives the eyes place to rest against the busy-ness of the many reds and blues.
This "Ohio Stars and Rails" Quilt used 2.5" scrap strips for the blues and reds. The solid white was 2.5" strips cut from yardage. (Can't do EVERYTHING from scraps!)
This "Ohio Stars and Rails" Quilt used 2.5" scrap strips for the blues and reds. The solid white was 2.5" strips cut from yardage. (Can't do EVERYTHING from scraps!)
Thoughts on using solids?
It seems there are always "RULES" in scrap quilting, and authors are always quoted as saying "Do not use this with this" or "You must use this with this." I have read a book recently that states: "AVOID solid fabric, all it does is read flat."
I have to add to this....I *DO* like to use solids, because to me they are another way of saying "almost neutral" because they ARE flatter than a print would be. They also show up the quilting detail much better than a print would, so they are a GREAT place for showing off really nice quilting.
A lot of quilts from the 1800's used prints and solids. I am LOVING the leader/ender project I am doing now...There are 5 squares in a row that go dark/light/dark/light/dark...and then on the ends of these are a SOLID red....it is going to act as a 'margin' between the pieced strips, and the plain strips I put between them.
Pics of progress...

If I used ANYTHING else besides that solid red....any print at all....it would be mushy and too blendy for what I wanted. The solid red is my 'punch card'. it says HERE I AM!
Here is a close up of a friendship braid quilt I did:

If I used ANYTHING other than the solid red....you wouldn't have seen the cornerstones in this pattern. Solids CAN be a good accent if they are used in the right way. (and can you tell I'm so partial to turkey red!?)
This is my "Somewhere In Time" quilt:

Quilt Close-up Quilt VERY Close-up
It also uses a solid turkey red. I was replicating this antique top from the 1800's:
Here is a pic of a double 9 patch variation:
I used a solid navy as the sashings because I wanted a space for the eyes to rest between the printy blocks. The light blue is also a print...and I just thought a navy would be a great place to showcase some pretty feather quilting because the 9 patches were too tiny to do something fancy in (they finish at 3") and the little blue squares were only 3" too....so solids here did it for me. I don't think they look "flat" at all, do you?
And this scrappy 6 pointed string star uses a wonderful solid civil-war poison green:
So I guess no rules are set in stone and I like using solids in my reproduction quilts. You can use them anywhere you would use muslin.....challenge yourself. Give it a try. You just might like the results!
(By the way, that same author says to purchase backing fabric only AFTER your top is finished so you can pick out a fabric that compliments the quilt top. She thinks they need to be compatible and interesting. I'm not going there! See my scrappy backs below!)
Storage ideas for Quilts-in-Progress!
Some other things I really like to help keep me more organized:
Big zip lock bags are great for keeping groups of blocks sorted from each other and yet together. You can file them upright and flip through them to pull which one you need. And of course, zip locks are reusable, I keep a drawer full of various sizes, from snack size up to 2 gallon size.
I also like plastic pencil boxes, plastic shoe boxes...just anything that keeps things together. Things with lids stack nicely! I like containers that are clear so I can see what is in there. Back-to-school time is a great time for finding bargains on containers like these. Otherwise, if it's out of sight, it's out of mind!
When piecing, I use safety pins to pin together units by 10's...10 blocks, 10 sections, 10 whatever....so it is easy for me to count how many I have and how many I need. For instance I needed 42 houses for the happy scrappy wonky houses quilt...as I was making them, I'd pin them together in sets of 10, so I wouldn't have to start counting at ONE every time I wanted to see how many I had done and how many left to go.
And while we are talking about using up our fabrics....don't forget about the BACK of a quilt!
You can ALWAYS make a big dent in the scrap stash by piecing your backs from many fabrics. I like to cut 10.5" squares of lots of fabrics, usually from the same color family, all blues, all reds, all neutrals, all pinks, etc. Why 10.5" squares? Well...I can get 4 squares across a 44" wide piece of yardage, and have really NOTHING but selveges left over. Total fabric annihilation! :c) The squares finish at 10"...so it is easy for me to figure out how many squares I need to go across the width and down the length of my quilt to construct my back. You can use any size of square you want, but I like to keep the math easy for me. I sew the squares block to block, but if you want to avoid seams that intersect you can offset them for a whole different look. Experiment with it! If you are like me, and have fabric coming out of your ears, who is really thrilled with the chore of having to go buy a 6 to 9 yard piece of ONE fabric for the back of a quilt?
You can ALWAYS make a big dent in the scrap stash by piecing your backs from many fabrics. I like to cut 10.5" squares of lots of fabrics, usually from the same color family, all blues, all reds, all neutrals, all pinks, etc. Why 10.5" squares? Well...I can get 4 squares across a 44" wide piece of yardage, and have really NOTHING but selveges left over. Total fabric annihilation! :c) The squares finish at 10"...so it is easy for me to figure out how many squares I need to go across the width and down the length of my quilt to construct my back. You can use any size of square you want, but I like to keep the math easy for me. I sew the squares block to block, but if you want to avoid seams that intersect you can offset them for a whole different look. Experiment with it! If you are like me, and have fabric coming out of your ears, who is really thrilled with the chore of having to go buy a 6 to 9 yard piece of ONE fabric for the back of a quilt?
I have machine quilted AND hand quilted through these pieced backs and they haven't caused me any problems at all. give it a try!
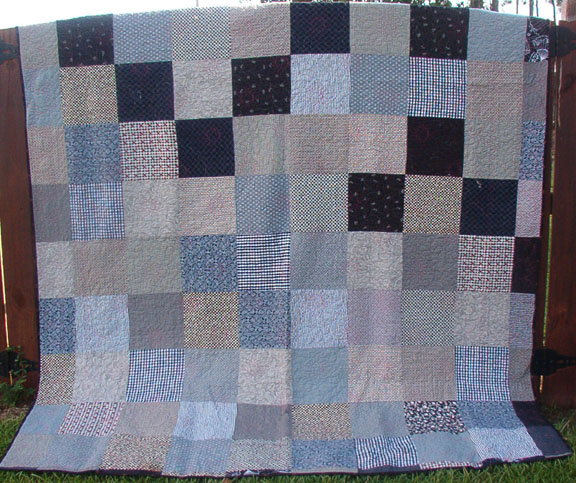
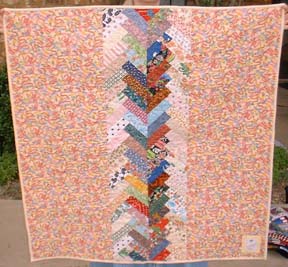
Here are some pic links of quilt backs I have pieced. These used up a lot of big sized chunks, left over pieces of yardage I didn't wan't hanging around anymore (less than 1/2 yard pieces I wanted to clear out) and I think they really make the backs fun!
- Back of Spiderweb String Quilt
- Back of Oklahoma Backroads Quilt
- Back of 6 point String Star Quilt
- Back of Red & Yellow 9 Patch Quilt
- Back of Ocean Waves Quilt
Other fun pieced backs:
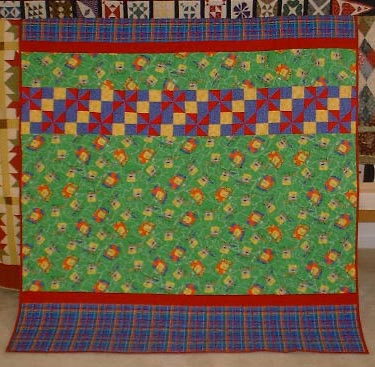
- Back of Sponge-Bob Quilt #1
- Back of Sponge-Bob Quilt #2
- Back of Double 4 Patch Quilt
- Back of Baby Postagestamp Quilt
- Back of Pineapple Swirl Quilt
Quilt backs are a great place to use up oddball or left over orphan blocks that didn't fit into a quilt, as in the "other" fun pieced backs above. Even the left over length of Pioneer Braid piecing found a home in a quilt back..even though the piecing was totally unrelated to the front!
Indispensable Gadgets!
(Don't we all love them??)
Susan R writes:
If you don’t mind I have question about the attachment shown in some of your sewing pictures. It seems to be something screwed into the base of your sewing machine. I can’t see it clearly in the pictures and have been trying to get something similar for my Bernina. Would it be too much to ask you to take a real close up picture of it so I can show it to my dealer and not sound like such an idiot trying to describe what I am looking for. Maybe you can post a picture to your web site since I can’t possibly be the only person interested in it.
Sure Susan!


This little nifty gadget is called a "seam guide" It is sold by bernina for bernina machines. You can get it at your bernina dealer. The dumb part is that the set screw is sold SEPARATELY from the guide itself, so be sure to ask for both. A way for them to make more money I suppose!
Whatever kind of machine you own, check with your manufacturer/dealer to see what is available. My bernina has a screw hole already drilled into the machine bed, so the screw just threads into it. I use this for ALL my piecing, it is terrific when speed feeding piles of strips through. The only thing that I 'don't' use it for is if I am having to match points with pins. The guide gets in the way of feeding the pins through. But it is fabulous for putting on borders and binding. Just screw the guide up against your 1/4" foot and voila....straight seams! The guide acts as a little fence to feed your fabric up against, keeping the seam allowance even and straight.
Newer berninas even have a niftier foot....the seam guide is built right into their 1/4" foot. It has a little 'knife edge' thingy. I've heard that janome and pfaff also have their own version of the knife edge foot, so check with your manufacturer.
If you have a featherweight, these are available for you too. One came WITH my featherweight, and I use it up against the 1/4" foot by little foot.
No screw hole and no foot available? Never fear, a couple layers of mole-skin (sold in the pharmacy section for using as cushion for bunions, etc) will build up a fence for you to stick to your machine bed. You might have to trim out a space to fit around your feed dogs, but it is worth it!
a 1/4" seam is CRUCIAL when piecing, and chances are, if you can see the edge of your fabric at all at the edge of the foot, you've already gone a few threads more than 1/4".
This page on making scraps work wouldn't be complete with out listing some of my favorite tools!

A regular rotary ruler for cutting straight strips. One I use all the time is from creative grids and it measures 6.5" X 12.5"
Sometimes rulers have so many markings that it is hard to find just what you want and need to be lined up with on the ruler. Since my scraps are cut and sorted in 1/2 inch increments, most of the time I don't need things with 3/8" lines or 7/8" lines. And as I get older, my eyesight gets more persnickety, so there are some others that are great for the way I work.

For smaller cuts I LOVE the Easy Square Jr by EZ. It has 1/4" markings, and 1/2" markings. That's it! I like the dotted 1/4" line all the way around the square. I use this one a lot when trimming paper piecing because I can put the dotted line on the line on the paper, and trim 1 /4" past it... It's great for cutting smaller scraps into squares and bricks without having to use a huge ruler. Great for squaring blocks by keeping that 1/4" seam allowance line where you want it to go.

This is the Easy Angle 6. I use this to cut 1/2 sq triangles from strips without having to add that 7/8" to the finished size! You just add 1/2" to the finished size to cut your strip, and the rest of the math is added in for you on the angled side. Cut matched sets with your strips right sides together and you are ready to just feed the 1/2 sq triangle pairs through your machine. This works GREAT with my scrap strips, because I don't have that 7/8" to worry about. It works with the sizes of strips I have already cut.

This is another great ruler! It's the Companion angle. Called the Companion because it goes with the Easy Angle above. This is the "goose" part of flying geese units. You also don't have to figure the math with this one. It uses strips in the size you have already cut. And then you use the easy angle above to cut the 'sky' part of the goose block using the SAME SIZE STRIP...This is a very versatile ruler. This ruler also makes 'hour glass' type blocks easy. I also used this ruler to make the hidden spools quilt and others:

Hidden Spools Quilt

The Wonder Cut Ruler is a terrific tool for when you need TONS of pieced 1/2 sq triangles in a hurry! I use this ruler a lot even for things like string piecing. It's a great tool to have.

This "Diamond Strings" quilt was made with the wondercut ruler!
These are just the basics of what I use on a daily basis in my quilt making. Try everything! Find what works for you! I know we have all bought rulers that we thought were going to be *IT* for us, and sometimes they didn't live up to their reputation or they just weren't for us. But you won't know if you don't try something new.
I hope this gives you an idea on how I make my scraps work for me, and makes scrap quilting fun instead of a drudgery!


Thanks a lot for this article! I have a steadily growing scrap collection and I wanted to put a system into its storage before it could get out of control and demotivate me from using them...I will for sure use your tips to start organizing...thanks again!
ReplyDeleteSilly question, but if I buy fabric in yards (sale!) is it okay to cut these down to workable less scary scrap sizes? I know it is my fabric, but can't seem to tell myself its ok. Help
ReplyDeleteYep its great to cut the yardage down to workable sizes. But do what works best for you.
DeleteI do actually do cut a lot of my yardage down to workable sizes.
Great read on the storing of scraps. I just made a recount and I have seven scrap quilts that need to be quilted.
ReplyDeleteThanks for redirecting to this post from Quiltville chat. GREAT post, Jo! You are just the best! :-)
ReplyDeleteI currently have all my scraps sorted by color, except strips and charm squares are piled up separate. I think you are right that one just needs to get going on using them! thanks so much for sharing!
ReplyDeleteYou can also cut strips into 3/4" to make fabric coiled bowls. I love to make scrappy bowls. This is how I use up 15" or less scraps.
ReplyDeleteGreat article. To my amazement I have all of your favorite rulers....but I don't know how to use them. I inherited them so now I will make sure I find directions to learn how to use them. Thank you =^..^=
ReplyDeleteBonnie - this is such an amazing system. Motivates me to develop my own the same way; as well as your "leaders & enders" method of building another quilt. I linked this page to McCall's facebook page where they asked the question "How do you organize you scraps/ How do you store them?". I had just read this column a day or two ago, and immediately thought of you when I was reading all the facebook comments, knowing yours made the most sense of any that I read. Enjoying your quiltcam!
ReplyDeleteGreat article. When I attend quilt retreats I set out a basket for donations of any scraps bigger than 1" sq. Some of my fellow retreaters think I'm nuts until they see the mini-mini quilts I'm able to create with their cast offs! Retreats and quilt classes are a wonderful source of diverse fabrics.
ReplyDeleteNow I get it. I started a strips and squares sorting system but wasn't using. I need to decide on a pattern! aha.
ReplyDeleteThank you for this article! Pieced my first quilt (a nine patch) in the summer of '52 at the age of 17. Quilted it 50 years later. Now, I'm making up for lost time, and enjoying it immensely! Raised by Depression Era parents, I love using up little scraps. Thank you for the tip on tools. Am eager to add them to my tool box.
ReplyDeleteThis comment has been removed by the author.
ReplyDeleteJust started my scraps collection. Do you think it useful to have 2,5" half squares in the bin? Or would it be better to cut them up in smaller squares? I love what you do with scraps. I'm using mine to make the Bitty Blocks Quilt as shown on the Quiltmaker blog.
ReplyDeleteThank you very much for the great ideas for storing scraps. The see through bins are great for seeing what colors are in them. I think a stick on paper piece would be good to write the size of the strips that are in the bins.
ReplyDeleteI like your pieced backings too. You mentioned hand quilting your quilts with pieced backings. I wonder how you handle the thick seams when hand quilting. Do you use the "punch and poke"? Or do you slip your needle through the top layer to make it easier to do the hand quilting in the seams. I wonder which method is most popular. Any hand quilters out there with an opinion?
Thanks for your organization tips. I'm a scrap quilter and have made a lot of mission/donation quilts over the past 20 years. Last year wasy best year with 50 quilts from baby to full sized. I've been blessed with many 'throw away' scraps and yardage so can build on tops and backs. It's amazing what some quilters throw away!! With all the stress of the pandemic this year, I feel blessed to have a productive hobby to keep my mind creative and positive. God bless all you quilters out there creating for others.
ReplyDeleteWoderful ideas, I am a scrap saver, just need more time to sew !!
ReplyDelete