
(Click HERE for printer friendly version!)


(Click HERE for printer-friendly version)
Can you find the spool shape where these strippy blocks come together?
This block is traditionally known as 'King's X'.

Note: this quilt requires the use of the "COMPANION ANGLE" by EZ international. It is a right angle triangle used for cutting flying geese, hour glass blocks and other triangles. I found mine at walmart.
Block size: 8 1/2" finished.
Directions:
Cut fabric into 2" strips...1/2 lights, 1/2 darks.
Cut fabric into 2" strips...1/2 lights, 1/2 darks.
If you are working with width of fabric strips (44") you can get 9 quarter blocks out of each strip tube. Smaller strip sets will get you fewer 1/4 blocks...but may be used.
Creating 1/4 blocks!
Step 1: Stitch two light strips to two dark strips with right sides together. Press each seam allowance towards the dark fabric


Step 2: Lay one strip set on top of the other, right sides together, with lights touching darks.
Step 3: Stitch along both long sides forming a TUBE. Press flat. This helps in the cutting process.


Step 4: Lay strip on cutting board....and align Companion Angle ruler...using the measurements that are down the CENTER of the triangle placing the 3 1/2" line along the bottom of the strip. There is a dashed line just 1/4" above the solid line. This line should be lined up on your seam line...
You will see that the top of the Companion Angle ruler is blunted....it also may reach beyond your strip set just a smidge...but don't worry. This will all be taken in in the seam allowance. Using your rotory cutter, cut your first triangle from the strip set along both sides of the ruler. (and if you are like me, you can't possibly stand tossing out those triangle ends you have left over! Here is a pic of a string quilt I made using up these 'Spare Parts'.


Step 5: Set the triangle set that you just cut aside, and flip the ruler upside down (Or the strip set, which ever is easier for you) Align the ruler again and continue to cut triangles along the length of the strip set.
Step 6: Pick up one of the triangles by the upper point....you will see that there are a few stitches holding the point together, gently remove these...(I just gently tug, but you can use your seam ripper if you need to.)
Step 7: Take these to your ironing board, open them up, and GENTLY press the center seam allowance towards the dark fabric. You will notice that the outside edges of the block are on the bias. With a design like this, bias edges have to be SOMEWHERE, and who wants to cut all these scraps into bias strips so that the straight is on the OUTSIDE?!? Just handle them carefully. You will find that the bias edges help to ease the seams together so that points meet crisply. This is a SCRAP quilt, remember?? This is the fastest way to use up these strips...

Repeat the above process (step 1 through step 7) 3 more times so that you have four DIFFERENT sets of 1/4 blocks.....this gives the best scrappy look to the quilt.
Step 8: Making the 1/2 blocks! Value placement is important in these blocks. Lay one stack of 1/4 blocks with the dark running on the bottom side of the diagonal center seam. Next to it, lay a stack of 1/4 blocks with the LIGHT running on the bottom side of the diagonal center seam. You want lights to touch darks when you put these blocks together...this gives the positive/negative effect that makes this quilt so appealing. Your 1/4 blocks should be laid like this:


Step 10: Lay the blocks out like this and stitch the two halves together!
Your finished blocks should look like this:

Here are a few rows of blocks laying on my floor...

Remember that blocks need to be sewn together so that lights touch darks to keep the positive/negative thing going. I also think this quilt would work great with one light fabric as the background....such as muslin? I just had so much stuff to clear out that I just divided fabrics into lights and darks to use them up. I also think that you could do a two color color scheme.....such as red/blue and use one constant light as the background...muslin maybe?? The blues and reds could all be different, but it would have some unity for an interesting design. This is one idea I want to play with. I also have thought of doing this with 1 1/2" strips instead of 2" strips for a mini quilt! The 1/4 blocks would only finish at about 2 3/4"
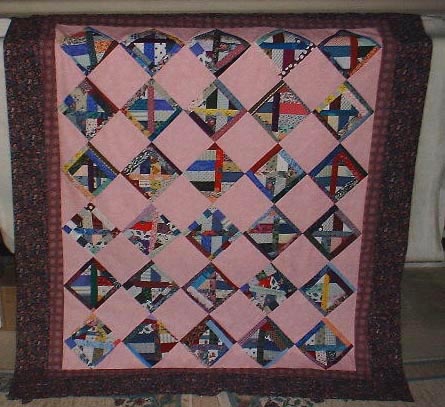
The finished top! I made 80 blocks and set them 8X10 for a quilt that measures 68X85 before borders. I framed the quilt center first with a 2" cut strip of a splashy black with white polka dots. I tried several different fabrics before deciding on the sour green with black dots and stars for the final 5" border.....when I laid that green fabric up against the quilt top, it just shouted YES at me!

The helpers are my son Jason on the left in the cowboy hat...and his friend Brian on the right. Im sure they weren't aware they would have their pictures shown to quilters all over the internet..*heheh* (PS..this pic was taken when Jason was a junior in highschool. He graduated in 2001!)

Hidden Spools in Lap Size! 20 blocks set 4 X 5 make up the center of this little cutie! With borders added it measures approximately 46" X 55"!
Additional hints:
When working with bias edges ESPECIALLY..it is important that borders be applied correctly.
Click HERE to read our border hints page!


When I try to print this from the printer friendly link, it goes to a school website with kids' photos.
ReplyDelete