>>>>
Showing posts sorted by date for query scallops. Sort by relevance Show all posts

Wednesday, December 28, 2022

When Santa Brings IntelliQuilter!


Somehow I ended up on the "Nice" list - because this is coming more than a week early!

IQ Guru Patty arrived yesterday afternoon - with a big Mary Poppins bag of tools and tricks and has been busy retrofitting the new IntelliQuilter to my "Old School" APQS  Millennium.

To hear this machine described as Old School cracks me up to no end - I remember selling my old Ultimate I machine purchased second-hand in 1995 for this new "All the bells and whistles" 2008 model.

All of the controls in the handles like joy sticks from popular video games of the day - even the sons and the hubs would come to check it out - Dave would bring his friends in to have a look, almost with a Tim "The Tool Man"  Allen "Ar ar ar ar" More Power chuckle in his voice, as if it were made by Binford, not APQS.

Thursday, September 30, 2021

Way Back When in 1987 -


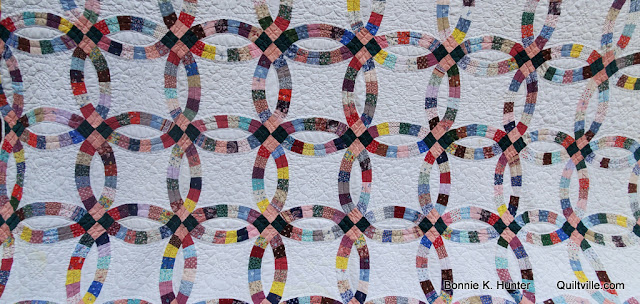
It was 1987 when I put the last stitches into my one and only ever (And I mean EVER!) Double Wedding Ring Quilt.

I was born in 1962 - I'm turning 60 in just a few months - and that makes me just 25 when I finished this beast.

On the radio - Bill Medley and Jennifer Warnes were singing "I've had the time of my life..." (Dirty Dancing) and as I go through all of these quilts with the great quilt migration of 2021, I have to agree!

Wednesday, May 12, 2021

Keep the Scrappy Goodness Coming!


We finally had a half-way decent and non-gusty day for some quilt photography!

You know how it goes - too much light and everything gets to looking washed out.

Not enough light and everything is grey and drab and dark.

Too much wind and "Woah, Toto! I don't think we're in Kansas anymore!"

Wednesday, July 31, 2019

Sharing Some Antique Quilt Love -


Cathy brought this wonderful quilt to Bedford PA -

Found in Marion, Indiana!

I am so glad we share a passion for old, antique and vintage quilts as well as new and fun projects.  We have so much in common - and Cathy's collection of signature quilts is always a joy to explore.

Who were these women and men who left behind their names in ink on fabric?

Monday, November 19, 2018

In a Constant State of Quilting!

20181118_084109

I love my piecing machines VINTAGE!
But I want my longarm DIGITIZED!

We’ve been working this machine quite a bit lately – with quilting up this year’s winter mystery Good Fortune, and the basket quilt I’ve just finished binding on (to be shown at a later date) and the Hunter’s String Star (previewed in last Friday’s Gift-Away post – did you see it?  Did you enter to win??) Along with Mona’s 6 projects and then my loading of THIS old 2004 UFO -

I think we’ve done in my computer system.  I got all the way to the last border and the machine started going herky-jerky.  No longer were my feathers nice and round, but they looked like a 3 year old drew them on an etch-a-sketch.  AUUGHH!

Son Jeff and The Hubster came down to see about adjusting cables further (Though he still can’t see anything due to Thursday’s Lasik and the protective lenses that are still in place on his eyeballs.) and things ran BEAUTIFULLY for the rest of that one row…but when I advanced the quilt to the last row, the fill in at the edge of the border – Herky Jerky All Over Again.

I unplugged myself from the cables and finished up the edge of the quilt free-hand, going old school.  Boy, it has been a LONG TIME since I have done that, and moving that machine head is a skill that can be lost over time.

Sunday, February 11, 2018

Nothin’ Could Be Finer Than to Quilt in Caroliner…

20180207_124719-001
And the Show & Share came and inspired all!

While never formally announced, yet always anticipated – if you come to one of my workshops, PLEASE bring anything that you want to share with others. 

We do a fun a quick show & share at the end of our lunch break, giving us a chance to know each other just a bit better, and it was WONDERFUL since we had folks join us from as far away as south Georgia (Nearly Florida!) Myrtle Beach, Charleston and all around. 

I love to see what you’ve been making!

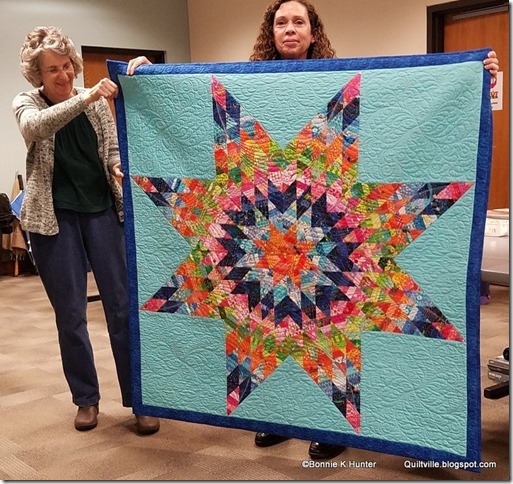
Isn’t this Santa Fe String Star from String Fling just gorgeous?

Tuesday, February 28, 2017

A Bloomin’ Road Trip!

20170227_125541
These trees down the road from my house put on quite the show each year.

Bradford Pears are amongst the first of the bloomers when it comes to spring, and it looks like they have been doing their happy dance the whole time I was away in Texas!

The leaves are starting to push the blossoms off the trees, and they are getting their halo of new green.

Of course blooming trees are MOST magnificent against a blue blue sky and yesterday was overcast – I shot this photo out the car window on my way to the post office.

After dropping off the book orders, I made a beeline (did you notice that bees do NOT go in a straight line?  They take a wandering circuitous route?) toward Raleigh. 

My baby brother Mike was flying in to town, the first of my siblings to come this far east with an opportunity for a visit.  He’s here for work.

His flight got in just before 5, and knowing this, I thought I could get to where he was staying, just under two hours from home, before traffic got really bad at rush hour.

Only……I had to make a stop.  Antique Mall Adventure!

Monday, February 27, 2017

A bit of Texas Show & Share!

20170224_185421
3 cheers for Ramona!

She finished her WHOLE Midnight Flight quilt during retreat!

And This should be April Fools Day! LOL!!  No, lovely Ramona came to retreat to work on other things even though she had already finished her beautiful rendition (Isn’t it cool to see them both, one behind the other?  COOL!) And surprised us all during show and share when she unfolded it and held it up to our view.

Midnight Flight can be found in my book MORE Adventures with Leaders & Enders.

This was the most relaxed and leisurely show & share – we had just finished our Tex Mex dinner, our bellies were full, we’d been sewing all day –and there was still evening sewing to come.  Perfect time to take a break and see what everyone had completed since the last time I saw them.

Wednesday, January 25, 2017

Some Birthday Antiquing!

20170123_101122
I was supposed to be home Sunday night.

But when storms rage and driving isn’t safe, a flip-flop of plans becomes necessary and then other options come to the surface.

Such as – If I am driving home at night, NOTHING is open.  But if I am driving home during the day, the sky’s the limit!

Instead of clicking my heels 3 times and setting my GPS to “There’s No Place Like Home” a made a bee-line to Sleepy Poet Antique Mall in Charlotte, arriving just after they opened at 10am.

I don’t think I’ve EVER been on a doorstep waiting for an antique mall to open before, the excitement and anticipation building as I realized that I was not going to get home before lunch at all.  Oh no, this was a birthday built for wandering and wander I did!

Two HUGE antique malls AND a stop at IKEA had me arriving home much later than the noon time I had anticipated.  I got home after 4pm.  With a huge smile on my face.

And you know what?  I did not buy a single thing!  NOT A ONE!  And not for lack of looking either.

Saturday, August 06, 2016

From Buck Mountain to Basement…

20160805_141453
This is a bit of the RIDICULOUSNESS that is going on with our Home Owners Association up on Buck Mountain.

It’s been a total tangle of wits and wills and personalities and stupid ideas.

When we bought there 3 years ago, the home owner’s dues were very affordable at $650 per year, with funds mostly being used to maintain the roads.  Many of them are dirt, only the steep inclines have black top for safety reasons…and we were fine with it.  Minimal head butting. All was good.

But the recent board has their own agenda for what Buck Mountain needs to become and has increased dues after a washed out road due to rain our first year to quite a bit more – it was supposed to be temporary just to put money back in the fund, but no…they’ve not let it go, and put dues back where they belong. And in fact they want to raise it MORE so they can do things like the horrid buck heads on the gate entry posts that you see here.

I swear, they are tarting up my mountain, and it looks worse than a 40% off sale at Hobby Lobby! Tacky Tacky Tacky!

They took our beautiful waterfall and made it into a “park” and it now has lit pathways and blooming flower pots, benches and tables, Adirondack chairs and HAMMOCKS….this is NOT the nature that I love.  It’s like they are trying to turn my beautiful natural mountain into a manicured country club.  This is our home owner’s dues at work, and it makes me so mad. 

LEAVE nature alone!  It’s perfectly beautiful just as it is!

(Yes, they have even put in a putt putt golf thing and basketball, and don’t get me started on the pavilion re-do that went from a simple and functional covered pavilion in the open air for gatherings and BBQs into a completely walled in “club house” complete with dish network so they can watch the super bowl games.  Your dues at work. GAH!)

Did the population of the mountain vote on any of this? No.  All the decisions were made and executed by the board with no vote ever being taken.  They never asked.  They just did.

HOAs are just a nightmare, and when we finally retire the plan is to sell both places and build somewhere away from HOAs and all of the headbutting and headache they bring.

To calm myself down over the addition of stupid buck heads upon the gate posts (That now look like a gestapo check point) I headed to do some antique browsing.

Monday, June 20, 2016

Show a Little, Share a Lot!

20160615_130329
I love seeing the show & share and it is always a surprise to those who have not been in my workshops before!

“I didn’t know to bring anything!” is the response.

And that’s okay.  Because if all 30 to 50 students brought something, or more than one something for our after lunch break show & share – it wouldn’t be quick!  We’d never get back to our workshop projects!

Show & Share time in class is supposed to be short and sweet, just like dessert –and still give us a chance to know who YOU are, see the things that YOU have made, and get our juices flowing so we are ready to head back to the machines and get piecing!

Friday, March 04, 2016

Some Flight Time Show & Share!

Diana1
 Good morning, everyone!

I’m here at the airport in Greensboro, NC – made it through security in a flash and have about 45 minutes before I board. 

I thought it was time to do some reader show & share here on the blog since I haven’t done that in a while.

I just love seeing what you send in to share with me and with others, so thank you for your photos and best of all your thoughts and stories that come with your quilts – tt’s the story behind the quilt that makes the quilt so meaningful.  The story behind the quilt is the HEART of the quilt!

I want to start today with this beautifully completed Allietare made by Diana!  Look at her scallops!  So wonderful!

Saturday, July 21, 2012

Sew Many Hexies!!

I’m sitting here resting my bones and going through today’s photos – oh my goodness did we have a lot of fun!

One of the things I love to do is have a “show and tell” right at the end of lunch ---there are always Quilters who bring stuff they know I would love to see, and of course we ALL want to see, so it’s become a fun way of seeing what others have made, and getting to know more about each other while we finish up our lunches and rest ourselves from all of the power sewing we’ve done all morning long.

Today I was blown away by three friends (( Two are cousins-in-law – they are married to two guys who are first cousins with each other )) and another friend of theirs who have been working on hexie quilts with 3/8” hexies!

MAN!

These are TINY!!

This little one is simply pieced with no worry about what goes where…just a sampling of favorite fabrics sewn into the tiniest little cutie ever! I wanted her finger in the photo to show just how small these hexies are.

You thought MY hexies were small? They feel like hub caps compared to these! Look!

PA_July2012 059

Here are MY hexies draped over one of these wonderful minis….See what I mean? That’s the difference between 3/4” ((Mine)) and 3/8” ((Hers))

PA_July2012 064

And just so you can see her whole piece…..are you WOW-ING Yet?!?

PA_July2012 065

Closer yet --- there is my thimble placed by one of the rosettes. These aren’t the tiniest hexies ever, but I liked the size…I liked that even though they were small, there was somewhere for the seam allowance to go without it being super duper thick, and that I could still see just what each print was. You get too small, and things get bulky and print detail is lost.

PA_July2012 060

One gal, inspired by the center panel of a medallion quilt, pieced her entire mini in shades of as many double pinks as she could find, with yummy random neutrals as the paths and centers. This week is STILL brought to you by the color PINK! :cD

PA_July2012 061

Yep! You can still see what each and every print is! I’m betting you are looking to see if you have any of these in YOUR pink stash too, aren’t you? See my thimble there at the top?

PA_July2012 062

This medallion is still under construction, and she is working at it in color rounds….and yes, my thimble is there too!

PA_July2012 063

Don’t some of these fabrics look neat when they are cut small? And yes, some of them ARE fussy cut!

And since we are in a Hexie mood, I can share with you one of the quilts that Mary shared with me the first night I was in Bedford --- Oh you guys…look at this!

PA_July2012 001

Wowser Wowser Wowser!

PA_July2012 004

1930s & 1940s prints in color rounds with spokes! How she used her fabric is so interesting, I love how the planned parts fade out in the randomly placed fill in areas!

PA_July2012 003

Doesn’t that final white edge look like rick-rack?!

I also love how the deep scalloped yellow border finishes everything off and gives a place for all the scrappiness to be contained, but still the scallops provide a softness, a gentle finish instead of stark straight edges. What a great quilt!

Mary is still at the shop. I’m just resting JUST A BIT --- and I’m not sure what we are doing for dinner tonight, but all the hard part is done. Tomorrow is a “Day Off” for both of us, and there was some mention of going to Bedford Springs Spa for some girlie time…Oh I hope we do!

My time in PA is passing too quickly, and I haven’t sewn a stitch! Maybe tomorrow would be a good day to do some sewing too ----hopefully you’ll be able to get some time in as well!

Enjoy your evening, Everyone!

Sunday, November 13, 2011

Drawing Time!!

I’m still unpacking! Somewhere, I’ve lost that Mp3 player again….it WAS connected to the headphones…but this morning, I could ONLY find the headphones…

And I have no idea WHY they were in the box of Cheese Nips crackers!!??! That’s the kind of “clean the car” episode we had last night upon returning home. It’s weird to have it dark so early……and easy to lose things in the dark!

I’ve just drawn TWO winners for the Patchwork Gilde Deutschland Magazine containing my “Zuckerwatte” ((Cotton Candy)) Quilt!

Are you ready?

Our first winner!

susan said...

Your blog is brand new to me. My friend Jeri L posted this on my wall, and so here I am. I hope you are having a marvelous time! Your quilt DOES look like cotton candy. Those scallops are beautiful! Thanks for the tutorial!

Welcome to Quiltville’s Quips & Snips, Susan! I’ve sent you an email and I’m just awaiting your snail mail address and will mail the magazine right out to you. I hope you’ll follow along in the future! Great things are coming up……including our Orca Bay mystery that starts on FRIDAY!!

((Funny funny --- someone was leaving a comment and must have been typing by phone because the auto-correct changed it to OKRA bay..heheheh!!!))

And our second winner!

Brenda said...

Bonnie, you make everything seem easy!!
I was scared (uh, still am!!!) That this will be on the new mystery!!! Oh well, feel the fear and do it anyway!! With you behind my back, watching over me, I know I could do this if it was going to be the end of the new project!!!

But saying that - THAT QUILT IS GORGEOUS!!!!!!
Love that!! The colours, the beauty, you have outdone yourself!!!
Question: what happens to the quilt after a magazine has used it?? So, you sent it off to Germany for it's photo shoot, now what happens to it??? just woundering....
I hope you have a very relaxing time on deck with your books and enjoy the cruise!!!


I've emailed Brenda and am just waiting for her snail mail address --- and HER copy will be off on its way to her too!

In answer to Brenda’s questions….After a quilt has been in a magazine, the copyright reverts back to me after a time and I am free to do with it what I want --- put it in a book, or upload it to the blog for everyone --- Each magazine has their own stipulations on how long they keep the rights on it before it returns to me, and that can be anywhere from 3 months after publication to a year, depending on the magazine.

As to the Zuckerwatte Quilt --- it’s going to appear in my next book, due out in July, 10 months after it was released in the Magazine.

As to the cruise! WOOOT! I’ve got so many pictures to go through and upload…so be looking for posts on that this week.

As for how things are here at home after the cruise?? Dear DH asked first thing this morning..”Is the dining room open for breakfast yet??” Man, I’m going to MISS that food service!!!

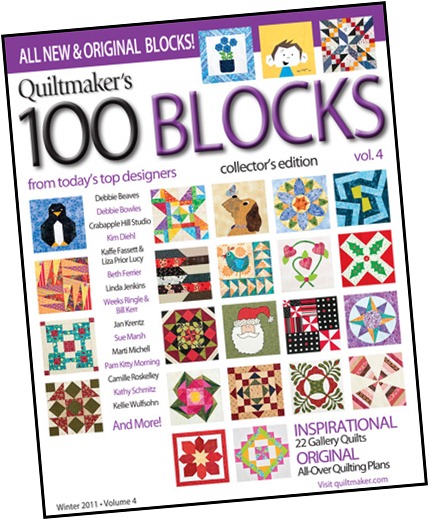
One more catch up ---- I’m drawing for the winners of 100 blocks by 100 designers volume 4 TOMORROW on my “Evening Edition” post! If you haven’t signed up to enter for your free copy…click HERE and leave a comment on that post ((NOT THIS ONE!!))

Good luck to everyone who entered, and be watching for that post tomorrow!


Thursday, November 03, 2011

Zuckerwatte Quilt & Curved Bindings!


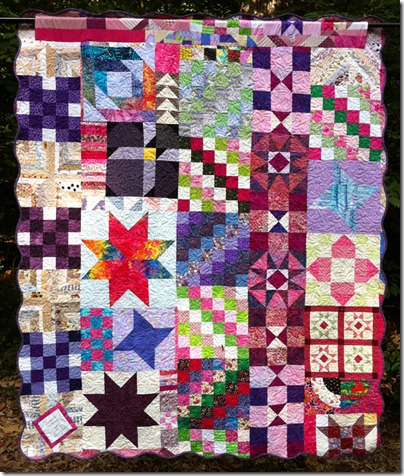
This tutorial is being written as an extension of a Quilt pattern that recently appeared in the September 2011 Patchwork Gilde Magazine in Germany! Remember I showed you the back of this quilt?
zuckerwatteback1

I was unable to show you the FRONT until it appeared in the magazine! And the Magazine is HERE!
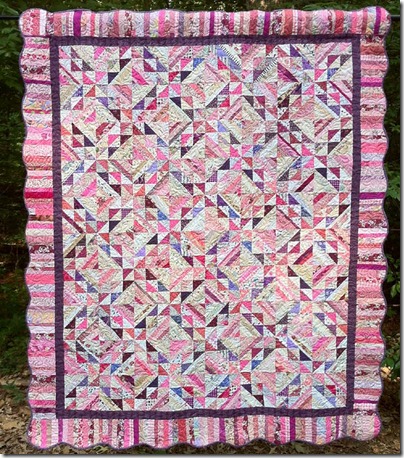
cottoncandy 050

Zuckerwatte is the German name for Cotton Candy, and this quilt, with its pinks and purples just have a Zuckerwatte feel to me! Are you surprised that there are more STRINGS in this quilt? I’ve been on a bender to use as many strings as I can in as many different ways that I can this year!

cottoncandy 058

You can find the pattern in the Patchwork Gilde Magazine! It’s the September 2011 issue, and it just arrived in my hot little hands this week! Yummy!!

cottoncandy 059

Along with the pattern for the quilt, is an article/interview from my workshop at Nadel und Faden in Stuttgart!

cottoncandy 060

I have such fond memories of being in Germany!! I wish I could read the text---but it is all in German! But look close at the right hand page….do you see what the underlay image is?

cottoncandy 061

It’s a very very light wallpaper effect of my traveling hexagon quilt! Yep, that went to Germany with me too! ((If this quilt could talk ---huh?))

If you would like to win a copy of Patchwork Gilde Magazine, leave a comment below and I will be drawing 2 winners!! Let’s leave this open for a while. I’m leaving on a cruise and I won’t be back until the 13th to draw --- but we will draw when I get home!

Now..the whole reason why this post is here --- there wasn’t room in the magazine to do the whole tutorial on the curved binding. And it is directing people to my website to find the tutorial! And I need to get it up here-----

Adding Gently Curved Bindings!!

The first thing you need to do is hop over to the Cutting Bias Bindings Tutorial to get your bias binding ready!

After quilting, stay stitch close to the edge of the outer border and trim the excess batting and backing away.Do not cut your curves yet! We'll mark the border, draw some lines, use the lines to place our binding, and trim later ----

Paper Templates!

I know there are many “tools” out there for getting even scallops, but all I need is a small plate and some extra paper!

Corner Template!

This is the first template we need to make, and because our borders were cut 5.5” before adding them to the quilt, we can do this out of a 6 1/4” square! If your border is wider or narrower than this, adjust the size of the square as necessary.
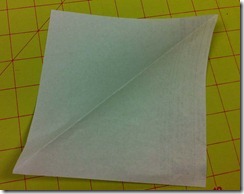
cottoncandy 067 cottoncandy 066

Start with a 6 1/4” square and fold it in half. Find a plate/saucer that will fit in the corner and give you the size of corner curve you would like…I just hit my china cabinet to come up this one. Lay the plate, pot lid, circle in the corner over the fold and draw a partial circle.

Decide “HOW” shallow your scallops are going to be….the shallower they are the easier they are to bind without cupping.
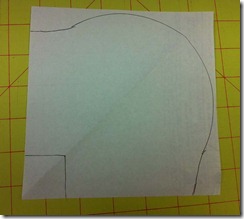
cottoncandy 068 cottoncandy 069

I wanted my scallops to be less than one inch deep and used that measurement to extend the line from my partially traced plate curve out to the edge of my square. Fold the square back in half, and cut out your corner template…..then snip a little 1 1/4” square out of the bottom corner of the paper square. This is where your template will line up on your inner border…

cottoncandy 023

This is how your paper will lay in the corner! You can adjust it as needed by refolding and trimming as desired.

Side Template!

cottoncandy 070 cottoncandy 071

Cut a 5” X 6.5” rectangle from scrap paper. Fold it in half. Using your plate, draw a gently curved edge at the top of the paper, and extend your shallow curved lines to the edges, wherever you think you would like your depth to be. Fold the paper back in half, and cut on the line. These are my two paper templates. You can see where I corrected that too-deep line on the corner by folding and trimming! Because the corner and the side piece are separate from each other, we can fudge the distance between scallops as needed when we draw the lines on the quilt border!

cottoncandy 072

I know I’ll be using these again, so I went and cut them out of left over template plastic! My first line wasn’t quite round enough and my corner piece was corrected when I trimmed. You can do it!

cottoncandy 024

Using chalk, a blue marker, or a pigma pen ---Yes, I used a pigma pen!!--- Trace your corners on to your quilt, and then using the side template, trace your curves on each border, adjusting the template to fit by sliding it closer together or farther apart as needed. This is very forgiving! If you want, you can start at both ends and work toward the center of each border length to keep things more symmetrical.

cottoncandy 025

Starting at the TOP of a scallop, part way down one quilt side, lay the folded bias binding with raw edges up against your drawn line. Start sewing, leaving about 4” of tail on your binding unsewn behind the presser foot. We’ll fix that later!

I use my regular presser foot to do this…the quilt is already quilted well, and my walking foot obscures my view for sewing a 1/4” binding. Stitch slowly, and try not to stretch the binding around the curves as you go. Think only a few inches ahead of where you are. Deal with each curve as you get there. You might have to lower and raise your presser foot to readjust the binding to fit easily around the curves. Don’t race! Take your time…it’s worth it!

cottoncandy 026

Here is a whole length of binding attached to the quilt, and the edges will be trimmed later!

Continue around the whole quilt until you reach a few inches from where you began. To join the ends of your binding, follow my directions on my straight edge binding tutorial HERE! You’ll have a nice invisible join with no lumps or bumps!

cottoncandy 036

Here is the binding, with the quilt edge trimmed 1/4” from the seam line! I’m ready to begin the handwork of stitching it down!

cottoncandy 034

I bind my quilts using the “ladder stitch” --- making the stitches completely invisble when finished! To do the ladder stitch, take a small side-ways stitch in the fold of the binding. Directly below where the thread exits the binding, take a small side ways stitch just below the machine stitching line. Move the needle back up directly above where the needle exited the quilt backing, and do another side ways stitch hidden in the fold of the binding.

Ladder Stitch:

You’ll notice that the quilt backing is facing me…and my fingers roll the binding down and over the edge of the quilt. I don’t even use those “hair clip” binding clips or pins!, I don’t NEED them….My fingers do the work for me! Pins and hair clips are just one more thing for me to lose ;c)

Zuckerwatte will be making its appearance in ENGLISH as a feature in my next book due out in July 2012. Copies of Patchwork Gilde are available across Germany, perhaps you can find someone who can pick you up a copy!

Or, you can leave a comment below to win one of two free Giveaway copies! I’ll draw for them upon my return from the cruise with Pat Sloan ---but give me a couple days to rest up, I think I’m going to need it!

Friday, August 05, 2011

Cutting Bias Bindings!

The other day I got a comment on my Binding Tutorial that read:

“How can you figure out how much binding/yardage you will need for a quilt when you are making BIAS BINDING? I have seen the chart for straight binding, and that's great, but how do you figure out the measurements when you're cutting bias binding??”

Quilts with curved edges require bias binding so the binding fabric will easily move around the curve without cupping and puckering. And sometimes, a stripe or plaid look BETTER cut on the bias than on the straight for the effect that you want. I’ve also been told that bias binding doesn’t wear out as quickly because the straight of grain is not on the edge of the quilt. It’s stronger.

((This pic is the BACK side of a quilt that is being released in a German magazine coming up, I can't show the front yet!))

This is MY take on the situation and how I choose to work with things, even though there may be other ways, other methods, other books, other tutorials, other charts for cutting squares etc. on the subject. This is just me sharing me....and a bit of why I do what I do and why it works for me.

The challenge with cutting bias binding comes in the calculation -----Usually a square is cut from the fabric, the square cut on the diagonal, and the pieces rotated and joined back together into a parallelogram. Lines are drawn, pieces are offset, and re-sewn into a tube, and then the tube is cut on the line with scissors.

The problem with this is that if you are "offsetting" your lines, aligning the top line with the line 2” below it --- your bias binding is not really on the “TRUE” bias. And you have to cut all that bias by hand with scissors after your tube is sewn together. To me the process is awkward.

And sometimes it doesn’t WORK for me to cut a big honking square of fabric! What if I want to bind a quilt that says that I need a 29” x 29” square? And I only have 1/2 a yard that measures 18” X 42”? Can’t I make better use of the fabric that way?

First off, you need to know the perimeter measurement of your quilt. Side + Side + Top + Bottom. And just to be safe, I add another 12” to that measurement. I need to figure the excess I need to miter corners and join the binding ends within that measurement.

And it also helps to think of standard quilt sizes when planning binding. That way I can figure out in my head based on the following what I’ll need:

Inches required for STRAIGHT EDGED QUILTS ((Curved and scalloped edge quilts will require more, plan accordingly))

Twin: 68” X 90”. Perimeter measurement + additional 12” = 328” 0f binding needed.

Double: 80” X 90”. Perimeter measurement + additional 12” = 352” of binding needed.

Queen: 90” X 108”. Perimeter measurement + additional 12” = 408” of binding needed.

King: 110” X 110”. Perimeter measurement + additional 12” = 452” of binding needed.

So these are my ball park figures that help me decide what size of fabric yardage to start with.

The more narrow the bias binding, the easier it hugs the curves and the better it looks in my opinion, so I tend to cut my bias at 2” for a binding that finishes at a snug 1/4”. I know some people like 3/8” binding and want to cut it at 2 1/4”. Just do a small recalculation using the following formula and it should work for you!

So here we go! Are you ready? ((Click HERE for Printer Friendly Version!))

1.) Measure the perimeter of your quilt and add 12". Divide this number by 42 (assuming about 42" of usable width on 44/45" wide yardage) and round up to the next even number.

2.) Multiply this number by your desired cut strip width . This final number is the length of the rectangle needed to make your continuous bias binding strip.

For example:

  • Quilt measures 71" x 90"
  • Perimeter = 71+90+71+90 = 322 and add 12" for a total of 334"
  • 334 divided by 42 = 7.95 Round this up to 8
  • 8 x 2 (for 2” binding strip width) = 16
  • You'll need a 16" x 42" piece of fabric for the binding

So I can get that bias binding out of a 1/2 yard of fabric instead of having to cut a 29” square!! That’s a much better use of the fabric, don’t you think?

You can use your own measurements in the formula above for figuring out your OWN needed size! Try it, it’s easy!

binding_1

This is my drawn piece of yardage!

cottoncandy 018

This is my actual piece of yardage! Fold one end of the rectangle over and align the edge like this:

biasbinding2

I leave the fabric folded, and use my scissors to cut along the fold like this:

cottoncandy 019

This is my TRUE bias. You can see I’ve placed a couple of pins away from the fold to keep things from shifting as I cut….And yes, there is a piece of green fabric tied to my scissors to warn any family members that these are FABRIC SCISSORS ONLY!

biasbinding3

Move the cut off triangle to the other end of the rectangle, and sew the selvage edges together. Press this seam open.

Here it is on MY fabric:

cottoncandy 020

Yes, I was making LOTS of purple bias binding! I was binding scallops, so I had to calculate in extra length. This is a fairly LARGE cut of fabric for that reason, but the method is the same!

binding_3_1

At this point, to keep the true bias, I just cut strips the width that I need from the bias edge of the parallelogram. You CAN do the drawing all the lines 2” apart, and sew the whole thing into a tube by offsetting it one line, and then cut with scissors on the lines to have it all in one length, but remember….it’s just “THAT MUCH” off the true bias if you do. And I find that the ability to fold the piece, use my rotary cutter to quickly cut strips, and seam them end to end is actually a faster process for me.

If you want to view the “tube” method with squares, go HERE.

cottoncandy 021

My 12.5” ruler isn’t long enough…I like this 14” one with it’s easy to read big numbers!

cottoncandy 022

When joining the strips end to end, be sure to overlap and leave dog ears at each end. Your stitching should come out right at the “V” in between the two pieces of fabric. Press seams open!

Applying the binding to straight edges is the same as with straight cut binding. You can visit my Binding Hints page to see how I apply binding, miter corners, and join ends.

I plan on doing a curved binding tutorial when time allows! I know I’ll need to have one in place when the quilt I have in the German Magazine is released…so be watching for it!