

Snow Day, Sew Day - Nowhere To Go Day!
No place to be but cozy at home as temps continued to drop outside and the wind continued to howl.
It's the kind of slow-down-snow-down-show-down that we all dream about, right?
For the most part. The dogs, however, are NOT a fan of temps in the minus range.
If I had to go out to take care of my own business, I would feel the same way!
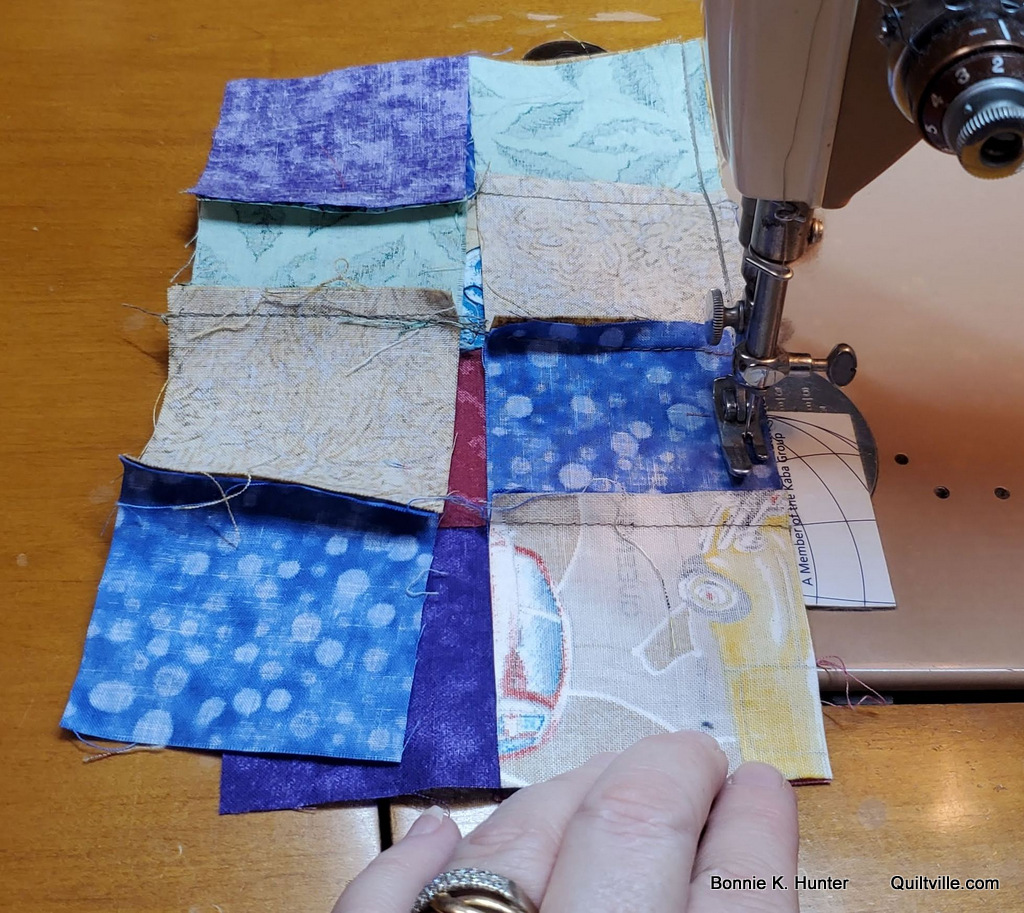
While working on these blocks (It's been a UFO since before the summer foot and face break) it occurred to me that it is likely a good time to also do a quick "webbing" tutorial.
It's been a long while since the "old" one, and those photos don't even come up anymore. Maybe Blogger has an expiration date on old posts. So here we go.

Let's start with a simple 16-patch.
When I've taught this in person, I use the analogy of "turning the page" as if we are reading a book.
Imagine your hands out in front of you, the motion of "turning a page." To continue reading the book, it's right-over-left, correct? If we wanted to CLOSE the book, we'd turn the left-over right. About as clear as mud, I'm sure - but trust me.
Please notice that the above pieces are numbered by COLUMN not by rows across. We have columns 1 through 4.
Most folks will start at the far left and flip column 1 over column 2 to start sewing. Only to go this way, you have to turn everything around so that your seam allowance is on the "correct" side. This is where confusion begins and folks give up.
Leave column 1 right where it is. Instead, we are going to "turn the page" and flip column 2 right sides together with column 1 like this:

"Two Over One!" is how it's done!
From this point it's easy to chain sew the pairs starting at the top of the block and chaining your way down to the bottom. Pieces do not have to be turned around to get the seam allowance on the right side.

Chain all the way down, leaving the chaining threads in between the pairs.
Do not cut them apart!

My 4 pairs from columns 1 & 2 with right sides together, column 2 on top of 1 and sewn, with chaining threads still intact.
From this point on it depends what you are sewing as to how you will press. Refer back to your pattern directions on what you should do here.
Because this is a simple example I pressed row 1 one direction, row 2 the opposite, and so forth so I could nest seams between the rows.

Column 3 over column 2.

Chain sew all the way down.

See how the chaining threads "web" everything in place?
The nicest thing about chaining threads - they keep those seams from popping open during the assembly process.

Add column 4 to column 3 with right sides together.

Chain all the way down.

One 16-patch block completely webbed together!

Cross-seaming!
With seams pressed the direction they should go, simply fold one outside row over the second and sew. There is no need to clip chaining threads unless you decide to "spin" the seams.

Sew all the way down. Press.

First two sewn, ready to flip 3rd one over and continue -
Sewing the 3rd row to the 2nd.

3 together, one more to go.

Stitching the last one.

And there you have it - one block successfully webbed and cross-seamed!
I hope this visual helps some folks who need to see it in action.
It's really easy to cut yourself 16 squares (These are 2 1/2'') and give it a try.
Remember to start at the far left of the block.
Leave column 1 right side up, and "turn the page" to place column 2 right sides together with column 1. Sew and press.
"Turn the page" to place column 3 right sides together with column 2. Sew and press.
"Turn the page" to place column 4 right sides together with column 3. Sew and press.
Follow this method until all of the rows are built while working in columns.
When all pieces are webbed, move on to the cross-seaming.
This works for full quilt tops (Straight set only, not on point) set block to block, or even straight set quilts with sashings and cornerstones.
Start small, get practice and get comfortable - and before you know it you'll be webbing full quilt tops like this:

More photos on this quilt top to come!

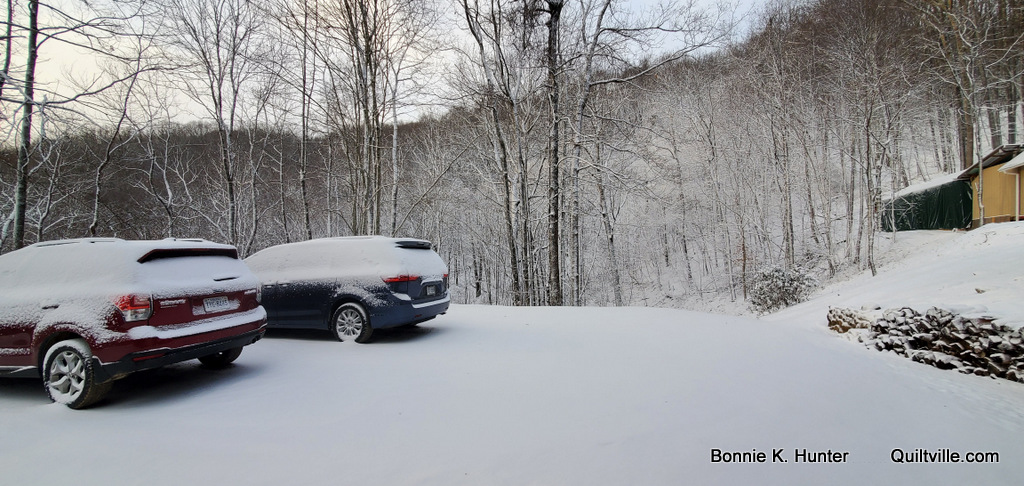
This morning it was -5????
We aren't going anywhere today!

It's beautiful, but it's so bitter cold out.
We are supposed to head down to son Jeff's for Christmas tomorrow afternoon. Tomorrow a high of 23 should make it do-able, but the hubster is still recovering from his ear infection.
The tractor battery is dead, and we'll have to plow that drive to make sure we can get back up it on our return trip.
Want to know something crazy? It's supposed to be 58 this coming Thursday?!? Geeesh.
Today? Those triangle blocks shown at the top of this post will be laid out and I'll web THEM together into a quilt top.
How is your holiday unfolding?

Quiltville Quote of the Day -
I’ve got all of the "little bit more" right here in front of me.
From my house to yours - Merry Christmas, everyone!


Merry Christmas, Bonnie, to your whole family. 2 and 4-legged. It's cold here in Myrtle Beach as well. First full time Christmas here. Hope the ocean doesn't freeze!
ReplyDeletethank you and Merry Christmas to you and yours... I hope the temperature will cooperate and allow you to get to son's house for Christmas, if not maybe the next day... it;s not really what's on the calendar, it's in your hearts and we know family comes first... maybe allow more rest and healing before battling the elements...<3
ReplyDeleteCats in Carlsbad CA
Perfect tutorial, very easy to understand. Thank you and blessings to you and your family!
ReplyDeleteThank you for teaching the webbing technique at one of your classes I attended! I use it all the time - even with 9 patch blocks. Have a good holiday in spite of the weather - it is still a 'feels like' temp of -20 degrees and the wind is still howling for the 3rd day straight here in SE MN. I've been listening to the scanner and law enforcement calls are many 'stuck in a drift in the road' calls. It must get tiresome to go on rescues in spite of the fact they have told people over and over to just stay home. Oh well - happy holidays everyone!
ReplyDeleteIt's only 5 degrees here this morning, but supposed to be in the 50s next week.
ReplyDeleteBeautifully explained ! And "slow down snow down show down" is going into the permanent record.
ReplyDeleteThank you for this instruction on "webbing"! I was able to appreciate the instruction to "turn over the page in the second column so it lays on top of the first column." That gave me a great visual and explained why I've had problems doing webbing on my own. However, I suddenly got lost when you jumped to "cross-seaming"! Because you then secretly turned the set of webbed patchwork squares one turn to the left, so that the previous bottom row became the left side of the square, and now it was time to sew "down" once again. It took me a minute to figure out how you magically went from 4 rows sewn together in one picture to 4 columns not sewn together in the next picture. Now I understand!! Take care! (It's 59 degrees inside my house, and 6 degrees outside here in Maryland this morning. Heat pumps are useless below 32 degrees.)
ReplyDeleteMerry Christmas from Minnesota! I'm in the Twin Cities are and it is currently -7. Thanks for all you do for us, Bonnie!
ReplyDeleteHave "webbed" for years. It's wonderful! Do you spin the seams on blocks this small?
ReplyDeleteWhen pressing rows such as you demonstrated, I press odd number rows to the right (it has an odd number of letters, 5) and even number rows to the left ( 4 letters). Easy for me to remember. I tried webbing a long time ago and found it difficult, maybe it's time for me to give it a 2nd chance. Wishing you and your family a very Merry Christmas.
ReplyDeleteHave a happy and healthy holiday. I'm sure the dogs could use a quilted coat about now! It's 7 degrees here in Southern NY right now. Bbrrrr!
ReplyDeleteMerry Christmas from sunny but cold central Florida! The webbing tutorial was wonderful! Makes great sense not to clip between all the joining so seams don't open up when putting sections together. Now why in the heck didn't I think about that?
ReplyDeleteMerry Christmas right back to you! It is cold in Houston, Texas, too! Our lowest was 14. Ready for warmer weather! I have learned so much from you over the years and I appreciate all you do to share your love of quilting. You are a blessing.
ReplyDeleteLove the tutorial. I do an additional thing when it comes to doing a full quilt in this manner. I have 3 different colored pins (think stop lights - red, yellow, & green). Green means go so that is placed at the very start in the upper right corner where two over one begins. The yellow gets placed at the center of three sticking straight out. Finally, red get placed at the final block in the upper left corner. All 3 pins are sticking straight out so when I stack all the blocks I can see the orientation at a glance. Two over one at the top of the stack in the order they'll be stitched and then the 3rd column in the order they get added, and the 4th, and so on all the way to the final block at the very bottom of the stack. This way I can lay things out, stack them up, take them to the sewing machine and stitch instead of having to go back and forth being the layout area and the machine. Hope this makes sense.
ReplyDeleteDid you discover this webbing miracle yourself ? I've been a fan of it since your first instruction. Love it and thank you for sharing it with us. Hope your Holidays are wonderful. Merry Christmas! Stay warm.
ReplyDeleteSo interesting to see this method......thank you for the tutorial. I was so surprised to see the fabric squares with Holden motor cars from around the 50's, a General Motors manufacture, which was the most popular motor vehicle for its time here in Australia! I had to look twice to make certain! Alas, the huge factory closed a couple of years ago, ringing the death knell for motor vehicle manufacture in this country. Fond childhood memories of one of our family cars.
ReplyDeleteMerry Christmas from Brisbane, Queensland, Australia. Temperature 26 degrees Celsius (79 degrees Fahrenheit).
Merry Christmas to you all! I hope your hubby's earache goes away soon!
ReplyDeleteMerry Christmas, Bonnie, to you and your family!
ReplyDeleteThankyou so much for the easy to understand explanation. I've been wondering what "webbing" meant and now I understand. Will try it at the next opportunity. Meanwhile I hope you and your family have a very happy Christmas and a great new year.
ReplyDeleteAwesome tutorial on webbing. Thank you for posting. Merry Christmas!
ReplyDeleteMerry Christmas to you and yours, Bonnie. Unfortunately I had to go out in the freezing cold yesterday bec Lucy doesn't like to go in the backyard to do her business. Today she gave me a break. The only time I went outside was going to
ReplyDeletemy daughter for brunch and opening Christmas presents with the family
Hopefully it gets a little warmer tomorrow.
Merry Christmas to you and yours. We had a lovely Christmas brunch at a friend's place on the Maroochy River in Queensland yesterday. Temp was 24 deg C, not too much sun but people out paddleboarding, fishing and boating or just sitting on the river bank with a Christmas picnic lunch. Hope your New Year is everything you want it to be.
ReplyDeleteMerry Christmas to you and your family! And to everyone else reading this! I am in South Central Texas and we got down to about 17* or so for a couple of nights. Today we got up to a balmy 44*!! But it's been straight sunshine so there is that blessing. We will be in the 70's this week! Crazy. Thank you for the tutorial. I do this with the 9 patch blocks, but have never tried it with a quilt top. Maybe the next time I do a small quilt top I will try it. Looking forward to the new year and many more quilty lessons to learn!
ReplyDeleteThanks for the webbing tutorial! I could never understand it before. Wishing you a wonderful New Year!!!!
ReplyDeleteBonnie, thank you so much for teaching webbing, I love it!
ReplyDeleteQuestion, do you web tops that are set on point? I'm working on an on point set top and couldn't figure it out.